
A game by Konami for Genesis, originally released in 1993.

The video game industry has never been afraid to take someone else’s good idea, and steal it outright. It has been going on since Pong, and it shows no signs of slowing.
When Sega decided to take on their direct competitor (Nintendo) during the 16-bit days, they went straight for the Super Mario Bros. series, the reigning king of not only the platforming genre, but gaming in general. In doing so, they created a character who was antithesis of Mario, and attempted to capture the attention of gamers who were entering their teenage years. Sonic was fast, edgy, and had attitude (or the more cringe-worthy term, ‘tude). Sonic the Hedgehog was a system-seller, and a game-changer, and marked Sega’s strongest foothold in the home console gaming industry. Not only did the character sell games, he also became the face of Sega itself… and everyone wanted in on that kind of action.


Suddenly, attitude-heavy platforming mascots of every breed (but mostly rodents) began flooding the marketplace, with many of the day’s big name companies entering contenders into the fight. Accolade had Bubsy the Bobcat, Sunsoft (developers of Blaster Master) had the Iguana-developed Aero the Acrobat as well as Zero the Kamikaze Squirrel, Irem had Rocky Rodent, Tengen had Awesome Possum, and the list goes on. These games ranged in quality from simply OK to barely playable. Despite the fact that some of these games received sequels, the edgy anthropomorphic animal extravaganza really only produced a small handful of titles that warranted any attention. Arguably the best thing to come out of the furry mascot frenzy was Sparkster, who was introduced to the world in a game known as Rocket Knight Adventures.
It’s not terribly surprising that the game that stood out from the pack came from Konami, a company that had already proven itself in the action-platforming arena. Furthermore, the game was headed up by designer Nobuya Nakazato, who is best known for his work on the Contra series, notably Contra III and Contra: Hard Corps. In fact, Rocket Knight Adventures shares more than a few similarities with these games, as they each contain crazy story lines, over-the-top action, a huge variety of gameplay from level to level (and often from screen to screen), the likes of which are rivaled only by Treasure.
Sparkster’s life after the original game is a slightly complicated affair. He went on to star in two games that were each called Sparkster. One was on the SNES, and the other was on the Genesis. However, despite having identical names and cover art, these were actually two entirely different games, developed by different teams, with the Genesis version being presented as the true sequel, as evidenced by the Rocket Knight Adventures 2 subtitle on the original Japanese packaging.


U.S. Version Japanese Version
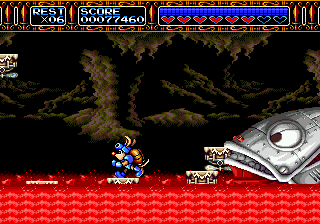
The Geneis version of Sparkster has quite a few differences from the original game. The rocket boost no longer has to be charged manually. It also charges very quickly and has 2 levels of charge, with the higher level sending you further and faster in a corkscrew attack. But, since you're not able to manually control the charge, you’ll often be stuck unleashing a fully-charged rocket-dash and be sent bouncing around the environment and into danger. However, you can also control Sparkster a bit more in the air, so you don’t just fall straight down when your power runs out.
A few new elements were added to change things up, including a fire upgrade for your sword that allows it to do more damage (but still no projectiles, and you lose the upgrade if you get hit), and a slot machine game that activates whenever you collect 10 gems, rewarding players with health or 1UPs, or punishing them with bombs dropped from the ceiling. Unfortunately, Sparkster’s ground-based combat was seriously restricted. He moves and attacks slowly, and is no longer able to fire projectiles, making it difficult to fight enemies up close.
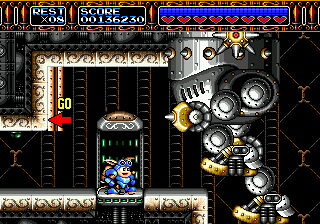
 However, while the Genesis version was supposedly the sequel, it was the SNES version that retained most of the gameplay from Sparkster’s original outing. The character controls in nearly the same way as he did in the original, with speedy sword slashes and projectiles, except now he has the ability to use his jetpack to shoot forward in short bursts and attack. The game is also built more around using the jetpack ability than the first game, and it emphasizes this by giving the player more room to move vertically.
Due to these differences, and the fact that neither of the follow-ups truly lived up to the first game, the legacy of Sparkster was left open to debate, and the series was thought dead… until 2010, when Konami released Rocket Knight, a downloadable 2.5D title that borrows gameplay from the previous entries in the series. More information on this game is included in the 3D AFTERMATH section below.
So, aside from a few cameo appearances, most notably in his appearance in a strip club in Snatcher (along with several other Konami characters) and in a hidden ending of Contra: Shattered Soldier (also developed by Nobuya Nakazato), Sparkster remains most fondly remembered from his original outing in Rocket Knight Adventures.


PREMISE
From the instruction manual:
The past
The world you are about to encounter is called Elhorn. It is a world of warriors, magic and machinery. It is also the home of the kingdom of Zebulos.
 Zebulos is a kingdom with a long history. Its first king was El Zebulos. Now, it is difficult to sort the ancient legends and myths from the facts. The prevailing belief is that El Zebulos was a brave hero who fought a band of evil would-be invaders who sailed in a powerful ship called the “Pig Star.” These invaders would have brought destruction to El Zebulos and his clan. They fought hard, and though the odds were against them, El Zebulos would not give up. His courage and conviction provided the leadership necessary to overcome their opponents. After defeating the invaders, El Zebulos became the ruler of the peaceful land, and the Pig Star was placed under a magical seal to keep it out of enemy hands. The “Key to the Seal” was guarded by Zebulos and his royal family.
 From generation to generation the Zebulan family has guarded the Key. Because the Pig Star had the power to destroy whole worlds, the Kingdom of Zebulos has always been subject to attack. An elite fighting force was formed – the powerful Rocket Knights. These armored warriors used rocket packs and mystical swords as well as superb fighting skills to protect and serve the kingdom.
 The current leader of the Rocket Knights is the brave Sparkster. He emerged as leader when the Rocket Knight master Mifune Sanjulo was destroyed by a corrupt knight called Axle Gear. Sparkster fought Axle Gear and banished him from the land, but there are rumors that Axle Gear has returned to the kingdom.
The present
 The kingdom has recently come under attack from the nearby Devotindos Empire. Overwhelmed by the robot-led army’s attack, the Zebulan forces are nearly wiped out. The Zebulan empire is on the verge of crumbling. Sparkster feels the presence of Axle Gear behind the attack, and heads to Castle Zebulan. Sure enough, Axle Gear has taken the Princess! He plans to use her as a hostage to blackmail the king and get the Key to the Seal, but he doesn’t realize that the Princess is actually the only one left who knows the location of the Key.
The future
There isn’t going to be a future if Sparkster doesn’t rescue the Princess from Axle Gear’s threat before the Key is recovered and the Pig Star is reactivated.
The fate of Zebulos is in your hands! You control Sparkster. Are you hero enough to face the challenge of a lifetime?


It’s also worth noting that the Japanese version of the game has an entirely different intro sequence than the U.S. and European versions. In the Japanese version, there are a bunch of possum kids playing in a field when a group of pig soldiers bursts in from the left side of the screen and chases them off. Then, the ghostly face and hands of the evil Emperor Devligus Devotindos appears, hovering in the sky above.


In the U.S. and European versions, the game starts with Sparkster standing on a high peak, facing the screen. He pulls out his sword, and the “camera” rotates around so that his back is facing the screen, revealing the Emperor’s fortress in the background, and then the ghostly visage of the Emperor appears in the sky.


The interstitial loading screens are completely different as well. The Japanese version has Sparkster standing amidst a possum orchestra as they play various instruments. The U.S. version, on the other hand, has a very determined-looking Sparkster standing against a starry background in a variety of different poses that change from level to level.


CONTROLS

 Attack
 Jump
Jump Attack
Hold the ATTACK button to charge the Rocket Pack


MECHANICS
Sparkster is equipped from the start of the game with every ability that he will have throughout his adventure, but the way in which he uses his abilities varies greatly from level to level. To start, he can run, has a standard 1.5x jump height, and he can duck. He can’t move while ducking, and if the player presses the ATTACK button while ducking, Sparkster stands up for a moment to deliver the attack and immediately returns to his ducking position.

Pressing the ATTACK button swings Sparkster’s sword, which injures up-close enemies, and also sends a projectile spinning forward in a medium range, hitting enemies at a distance for a bit less damage. Holding the ATTACK button charges a meter in the upper right corner, and letting off the button results in one of a few possible moves.

If the player is not pressing in any direction when letting off the ATTACK button, Sparkster will spin in place for a moment, with his sword slashing around him. He is temporarily invincible during this time, and it’s a good attack to use against enemies that are actively moving in on his position.

By pressing UP on the D-Pad, Sparkster will rocket straight into the air. In the early horizontally-scrolling levels, where there is no ceiling, Sparkster will fly off the top of the screen and eventually fall back down to the ground, flailing his arms has he goes. It is not possible to control Sparkster’s direction while in the air. So, a rocket-jump straight up will result in a fall straight back down, unless he manages to land on a platform.

Pressing up at an angle will cause Sparkster to rocket in that direction, again flailing his arms and falling to the ground. An obstacle early in the first level teaches the player about this movement, as rocketing straight up will not allow the player to clear the obstacle. Only flying over at an angle will do it.

And finally, pressing straight forward will cause Sparkster to rocket in that direction with his sword out. This strategy, and the diagonal rocket-jump, are the keys to winning a number of boss fights, as it allows the player to deal a quick and destructive blow from across the room. If Sparkster encounters a solid surface while rocketing along, he will ricochet off. In a straight line, this means that he’ll bounce back in the direction from which he came, but at an angle, he’ll bounce around like a pinball.

The player also learns this bouncing ability early on, when he encounters a vertical section with arrows printed onto the blocks in the background, demonstrating the need to ricochet at 45-degree angles to make his way up the shaft. The player may also charge the rocket pack and then jump into the air, initiating a rocket-jump in any of the 8 directions allowed by the D-pad.


Sadly, advanced rocket-jumping – and rocket-jumping in general – is not utilized overly much throughout Sparkster’s adventures. Most of the levels consist of narrow passageways that result in unpredictable ricochets, making it unwise to use the device except in areas where its use is prescribed. Most areas have only one path to survival, and it generally does not involve heavy use of the rocket pack. This also means that in the few areas where the rocket pack is required for survival, players will not have had much practice with it, and will only learn what they need to do by repeatedly failing in their attempts.

Sparkster has one additional move that is unique to him among the video game heroes of the world, namely that he can use his possum tail to hang upside-down from branches and rails and shimmy along to the left or right. There are entire sections of the game devoted to this mechanic alone.

When Sparkster encounters a slope while hanging, he will slide down, building up momentum very quickly. This momentum can be used to fling him off the edge to grab pickups ski jump-style, or send him across to another branch. He can also charge his rocket pack while hanging on a branch, allowing him to fire straight off in any direction. Pressing DOWN and JUMP will drop him to a lower platform.

Among the available pickups are gems and 1UP icons. Gems are worth points, which eventually lead to extra lives. You get a life at 20,000 points, another at 40,000, and then one every 60,000 thereafter. And you’ll need all the lives you can get, particularly if you’re playing the U.S. or European version of the game.

When Rocket Knight Adventures was brought to Western markets, Konami felt the need to increase the game’s difficulty level. Therefore, the Japanese Normal Mode became the Western version’s Easy mode. Given more serious tone of the Western version’s introduction and cover art, it seems that Konami was attempting to appeal to a more grown-up audience. Even so, Sparkster’s arm-flailing, cute pantomimes in cutscenes, and playful idle animation carried over from the original game, making it difficult to take the game too seriously. That’s not even accounting for pigs running around in their underwear…


The change in difficulty means that players begin the game with fewer lives and fewer continues than the Japanese counterpart, and enemies cause more damage per attack. This also makes the U.S. Hard mode brutally difficult, giving the player only 1 life, 1 hit, and no continues.
Sparkster has a health bar represented by a row of hearts. Graphically, the indicator moves in ½ heart increments, although he can lose health in smaller amounts as well. Restoratives include an apple, which restores 1 unit of health, and bananas that restore 4 units. Neither appears in great frequency.

Almost every enemy that Sparkster encounters is a pig. That may sound like you’ll be grinding your way through lots of cannon fodder as you make your way through each level, but that couldn’t be further from the truth. Seemingly taking a page from the book of Metal Slug, enemy pigs not only attack you directly, but also appear in a number of large and generally absurd contraptions.

Often, unique mechanical creations will appear in only one level of the game – or one short section – never to be seen again. Each of these enemies has its own moveset and attack patterns, making for a title whose gameplay can vary greatly from level to level, and sometimes from screen to screen.

You’ll encounter pigs in cars that drive onto the screen at full speed, giving you just a moment to react before they fly straight into you. There are pigs in bipedal mechs that stomp around, but which are destroyed with just a few sword strikes, crumbling away in pieces. Some pigs descend from the skies on balloons that are easily popped. And pigs that come straight at you will find their clothes stripped from their bodies, leaving them to run away in just their boxers (although you can hit them again to knock them off the screen).

And it’s not only the enemies that change; basic gameplay is significantly altered throughout each level. It would be more fair to describe the game as a series of “action vignettes” rather than a straightforward action game where you’re using the same basic mechanics from beginning to end.

First off, in addition to the side-scrolling and vertically-scrolling sections of the game, there are also dedicated horizontal flying sections. In these sections, Sparkster’s jetpack remains fully charged, and he flies from the left to the right in shmup-style levels. There are even boss encounters at the ends of these flying sections, some of which mimic bosses from Konami’s Gradius series. Actually, there are few Gradius references in these flight sections, such as shooting every enemy in a wave for a reward (in this case, an apple).

Even the platforming levels have a few forced-scrolling areas, featuring high-speed runs through complex environments as the floor rises up to crush you, or in one instance, where a flaming wall of death moves across the screen from right-to-left, shooting beams of fire at you as it goes. These forced-scrolling areas sometimes require a bit of trial-and-error rocket-packing in order to successfully make your way through.

In one of the more cleverly designed areas, Sparkster finds himself moving along in front of a waterfall, with platforms and spikes all around. Some spikes are in the foreground and will harm him, but others are in shadow in the background and seemingly have no effect. But then the player encounters a spinning set of platforms that are constantly moving through the waterfall, from the background to the foreground and back again.

By jumping on a platform while it’s in the foreground, and riding it through the waterfall, Sparkster is transported into the background. There, he must dodge spikes in the background while passing unharmed behind the foreground spikes.


There are a few instances within this section where the player must switch between the foreground and background to make his way through. The whole experience lasts only a couple of minutes, and the gameplay is never duplicated again throughout the adventure. Other games, such as Super Mario World built entire levels off of this type of experience and used it again and again throughout the game (of course, Super Mario World was a much longer game), but Rocket Knight Adventures is more about showcasing these interesting and unique gameplay elements, and then doing away with them.


One of the most talked-about sections in Rocket Knight Adventures is an area where you’re navigating through a cave with rising and falling lava that kills you instantly if you touch it. At the beginning of the section, the player sees the lava rise up, and in the lava itself the player sees a reflection of Sparkster and the surrounding environment. But, it’s more than just a neat graphical effect; it also has an impact on gameplay.


Once the player reaches a certain point, he is no longer able to see where the next platform is located due to obstructions in the foreground. Instead, the player must use the reflection in the lava to determine the proper route, and jump from one platform to the next, effectively making the player think about things from a reversed gravity standpoint… except that nothing has really changed. Sparkster hasn’t gained some ability where he now sticks to the ceiling, and gravity in the room isn’t being reversed; it’s just that the game is forcing the player to complete the challenge by looking at it in a different way.


There is also a mine cart level, which was fairly common in games of this era. It’s a somewhat difficult section, particularly given that instant death awaits Sparkster if he falls off the bottom of the screen. The mine cart moves very quickly, and doesn’t give the player a great deal of time to react. Rows of signs with exclamation points indicate upcoming spikes that must be ducked under, and signs with X’s indicate that the track is about to end, but the player certainly wouldn’t know that on his first time through the level.


Eventually you’ll face off against pigs riding mine carts of their own and tossing grenades at you. You can freely move the cart to the left and right along the track, and even jump, duck, and rocket-dash, but the speed of its scrolling it out of your control. Toward the end of the section, you’ll need to jump from one mine cart to another, which can be a bit difficult given that you maintain some of your forward momentum.


Water comes into play in several areas of the game. Your first interaction with water is during the free-flight sequence toward the beginning of the game. Rocketing just above the surface of the water leaves behind a nice wake effect, and diving below the surface of the water slows you down somewhat.

Later, you’ll encounter underwater sections with currents that push you back, leaving you to grab poles with your tail to keep from being swept downstream. There are also sections of rising and falling water where you have to avoid deadly fish (except when the water drains and they’re helpless) while swimming over and under rows of spikes, and rocket-dashing to avoid getting hit before the water moves again.


One very interesting bit comes in the form of a platform with huge mechanical legs. When you jump on it, the platform starts walking, taking you head-first into enemy bats that you must dodge or fight, but the platform also carries you safely across the bubbling lava below. Fortunately, this lava only causes damage and doesn’t kill you outright, because it’s easy to be pushed back off the platform, and unlike the mine cart section, you can’t just jump and expect the platform to follow you. Here, jumping means that you could miss your landing and fall off.


Also, there are rows of spikes lining the ceiling in some areas. If you stay on the platform and try to duck under, you’ll get hit by bats, and there’s no way to fight them off. If you press the ATTACK button while ducking, Sparkster stands up, ramming himself into the spikes. So, at certain times, you’ll have to drop off of the platform, follow along behind as it walks forward without you, and then hop back on when it gets to a pool of lava.


One short section introduces a platform that has an up arrow on one side, and a down arrow on the other. The platform automatically scrolls to the right, and you have to hit the arrows to make it angle up or down as it moves. The first room is easy: just go under a low overhang and back up. If you fall off, you just run back and try again. This is one of the few instances in the game where you’re not punished for being unable to master the mechanics on your first attempt.

But, once the practice room is done, you’re tossed into the fire. You’ll navigate through a huge room lined with spikes. Hitting spikes will knock you off the platform, and this time there’s no running back to get another chance; here, you’ll be sent plummeting to your death as you fall off the bottom of the screen. Gems are spread throughout the area, giving you some indication as to the safest path of travel, but there are actually a couple of different ways to make it through this section, with high road and low road options throughout.

Despite the drastically altered gameplay from section to section and level to level, the overall feeling of progression is done very nicely. If you’re flying through an outdoor area, and the next section is in a tower, the game doesn’t just fade to a black screen and start up again with you inside the tower. Instead, Sparkster flies face-first into the tower, breaking a hole in the side.


Levels are also tied together with cutscenes. At the beginning of the first level, we see the castle of King Zebulos under attack in the background, and Sparkster flies into action to save the day. Sparkster travels across the land, flies across the water, and eventually busts in to find the castle under siege with fires burning and holes broken in the walls.


When he reaches the top of the castle, he finds Axle Gear (Sparkster’s nemesis) kidnapping Princess Sherry and making his getaway in an airship.


Throughout the next couple of levels, Sparkster travels across the countryside, eventually catching up to the airship and getting launched through the air to board it.


Sparkster covers every inch of that airship. He fights his way through the inside, eventually launching himself up on top where he must fight the wind (and Captain Fleagle’s attempts to stop him), eventually making his way past the cockpit, where he can actually see Axle and the Princess seated inside. From there, he works his way beneath the airship and up into the engine room (the airship is humorously pedal-powered by pigs), where his encounter with a boss causes the airship to be destroyed.


Axle launches an escape pod, and we see it fly off into an industrial city, which is the Kingdom of Devotindos. The following section features Sparkster flying through the city with smokestacks burning in the background.


Eventually, Sparkster makes his way to the throne room of Emperor Devotindos to rescue the princess, but not before Devotindos launches his own escape pod and flies off into space toward the Pig Star, which is the setting for the final level.


These additional scenes go a long way in creating the feeling of a single cohesive world, rather than simply sticking with the jungle level, ice level, fire level formula of so many other titles. This is a case where the developers put forth the extra effort (and therefore more development money) to create something that doesn’t directly impact the gameplay. Many games of the preceding 8-bit era didn’t leave much room for storytelling, but that was due as much to gaming’s arcade roots as it was the hardware and space limitations.

Here, in the early days of the 16-bit era, Konami was emphasizing the storyline as an important element in an action game. In later generations, most action games would come to be punctuated with cutscenes expositing their story elements, long dialogue sequences, and more than a little soliloquizing on the part of the lead characters. Rocket Knight Adventures tells its story mostly via pantomime, and by connecting its environments together in a logical way, leaving the player’s imagination to fill in the rest.

The game also has a fair bit of humor as well, from the aforementioned pigs who get knocked out of their clothes, to pigs who run around with their butts on fire. Sparkster himself has a number of humorous animations, from flailing his arms in panic when his rocket pack runs out, to waving his arms while standing at the edge of a ledge, to his idle animation (something that was popularized by Sonic the Hedgehog and became very prevalent during the 16-bit era) where he pulls of his helmet and pops up a voice bubble saying “Let’s go!” This is done in more of a humorous way that Sonic’s impatient “what are you waiting for” foot-tapping.

BASTARD CLASS ENEMIES (What's this?)
 Invincible (?) Armored Pig In Area 5, the player is introduced to the Invincible (?) Armored Pig. And yes, the question mark is part of his official title in the instruction manual, as in… “Is he really invincible?” That’s part of the fun, as you’ll see in a moment, but basically you’ll want to avoid the things at all costs, since they can kill you in a single hit.
Just before the player meets his first IAP, he gets a 1UP. It’s just hanging there in the air for no apparent reason, and a savvy player might wonder why the game is suddenly so giving with its rewards. By continuing to the right, the player will have his answer, as a pig comes running at him with a spiked shield. With very little time to react, and even less time to charge a rocket jump to blast over the head of the attacking pork marauder, the player will likely die.
Fortunately, in one of the game’s few acts of mercy, the player respawns at the beginning of the section with the 1UP floating in the air. You’ll have to deal with several armored pigs, so keeping the jetpack charged is well advised. But, because the game scenario is ever changing, the player will find himself challenged in a new way in the very next room.

Upon entering the next room, a row of armored pigs will drop down from the ceiling and walk to the right, falling off of a ledge. At first, it seems like they’re moving away from you and that you won’t have to deal with them, until you realize that your only means of progression is to drop down. This makes the descent somewhat tense because you don’t know where your enemies are. But you’ll have that answer soon… they’ve reached the bottom of the area, and now they’re rocket-packing up to kill you! You have nowhere to run but back the way you came, and that’s a dead-end. Congratulations, you have just died… and you have learned something from it.
The trick is that it’s a race. You have to get down to the bottom before the pigs do, racing them to the teleporter. You descend as quickly as you can down the left side of the screen, while they descend down the right. In this way, you can see where they are relative to your position, whether you are catching up, or falling behind. And if you do make it to the teleporter, you’ll find even more armored pigs in the next room, dropping down from the ceiling.

Here, the armored pigs give chase, leaving you to charge through the environment lest you succumb to their shields of instant death. At the end of the path is a pit of lava, with a button on the far side.

You can rocket across and press the button, which opens the path to the exit. But, you’ll want to stick around for a second, as the charging pigs aren’t far behind, and you get to watch them tumble off the ledge like lemmings, exploding in the lava below. So, you see, they’re not invincible after all.


BOSSES
Rocket Knight Adventures is definitely a game that revels in its boss encounters. This isn’t terribly surprising given that the game was headed up by Nobuya Nakazato, of Contra III and Contra Hard Corps fame. Outside of a handful of titles from Treasure, you’d be hard-pressed to find a game that loads you up with so many bosses as this one.
Each stage is divided into several sections, and many of these sections end in a boss battle, giving you 2-3 boss battles per level. And, given that your enemies are pigs, many of the boss encounters are against pig-mechs and other pig-related contraptions.


Stage 1: Kingdom of Zebulos
Sub Boss 1: Pig Tank Your first boss fight is against a pig piloting a pig-tank on a bridge. The tank has a short-range flamethrower. You can duck beneath it, but after it shoots straight forward for a bit, it will start waving up and down, so it’s best to just stay out of its range altogether.

The top of the tank can also rise up, revealing a cannon beneath, which fires 4 bouncing metal balls. They’re a bit hard to dodge, but you can hit them to destroy them.

The only way to cause damage is to hit the pilot. Getting up close can be somewhat difficult, but since it really only deals damage in a forward-facing direction, you may find that getting in behind it is the key to success. You can rocket over the tank and stand behind it, getting in a lot of free hits. It’s still important to be careful, however, as touching the tank does more damage than any of its other attacks.

Once the tank is destroyed, the bridge breaks and you fall into the raging river below. That’s right, the very first sub-boss is a 2-part battle. Sparkster can still move to the left or right just as if he were standing on a platform, but the rushing water does add to the overall confusion.

After a few seconds, the top of the pig tank will drop down into the water and start bouncing around, once again causing heavy damage if it makes contact with Sparkster. Hitting it with your sword will deflect it away, but it will continue bouncing around until it is destroyed. Sparkster’s spin dash maneuver is a good way to deal out damage without taking any yourself, since it will deflect the tank while you remain temporarily invincible for the duration of the attack.

Sub Boss 2 The next boss appears at the end of a flying section over a lake. The serpent enters from the left, rising up out of the water and diving below in a wave pattern.

Eventually, it will turn around and start jumping out of the water, and each successive jump will be somewhat lower, making it more difficult to dodge. After it makes a few jumps, it will disappear off the left side of the screen, and the pattern will repeat.

As expected, the serpent’s head is its weak point. Once it has been destroyed, Sparkster will rocket into King Zebulos’ fortress, bursting face-first through the wall.

End Boss The lead-up to this boss fight sees you fighting your way through King Zebulos’ fortress, which is under siege by the pig army. As you near the final chamber, you’ll catch a glimpse of the boss outside the window.

When you enter the final room, the boss comes down and breaks 3 holes in the ceiling, and then breaks through each wall (a yellow dot warns you where he’ll attack next).

Once he has aired the place out, he’ll begin alternating between a couple of different types of attacks. In one attack, the boss will drop several pairs of mechanical spike-spiders, which crawl along the floor, up the walls, and across the ceiling. They are invincible, and there’s just enough room between them to jump around.

Eventually, the boss will drop a red glowing detonator spider in the room with you, which moves more quickly than the others. Hit it, and all of the spiders will be destroyed.

The boss can also drop its head down into the room (that’s its weak point), while it unrolls its tail through one of the holes on either side of the room. You can get in some quick up-close hits on the head before the tail comes through, but the tail will eventually move past the center of the room, so you’ll need to back off. Still, you can stand back and hit the head with some of your less powerful projectile attacks.

Lastly, the boss can quickly thrust its head in through any one of the holes, causing melee damage if it hits you. Standing in the center of the room is the safest place since the only attack that can reach you from that point is one from the hole directly above. This lets you get in multiple hits on the head while only occasionally dodging.

Stage 2: Mountain Range
Sub boss 1: Repulsive Raccoon Robot The first sub-boss in the mountain range attacks you as soon as you enter the level. A huge pig-piloted mech rises up over the mountains in the background, and starts swinging its arms wildly, attempting to hit you with its spiked hands.


You’ll need to avoid the arms, and get your rocket pack charged, since the mech’s only weak point is its glowing red nose, and you’ll need to rocket up out of the water to hit it. Getting hit by the spikes not only causes damage, but also interrupts your rocket charging. Smash the mech's nose to ensure that it is no longer able to play in any raccoon robot games.

Sub boss 2 This boss battle takes place at the end of the aforementioned waterfall section, where Sparkster must transition between the foreground and background in order to traverse the level. Now, the player must contend with a boss that is based on these same mechanics: a googley-eyed metal serpent that can travel freely between the foreground and background.

The floor of the area is lined with spikes. There’s a pair of vines on either side from which you can hang, and a matching pair in the background. There’s also a pair of platforms at the bottom of the level that allow you to move between the foreground and background, although that’s not strictly required for victory.

The serpent cannot touch you while you are on the opposite layer, nor can you harm it. However, it moves very quickly, and can emerge into your layer with very little warning.

Since you’re invincible while rocket-dashing, you can get in a lot of hits by rocketing back and forth between the vines. Also, the serpent will occasionally spin in a circle, allowing you to get in a number of sword strikes in succession.

End boss This is a multi-phase battle against an insectoid train engine. It takes place at the end of the mine cart section, and Sparkster must fight the entire battle while riding on a cart. Just prior to the battle, Sparkster will be sent smashing through a chicken coop, and one of the chickens will hover around his head for a while at the beginning of the boss fight.

In its first phase, the train comes up from behind you, firing blue projectiles from its cannon. Dodge the shots and rocket-pack the engine in the face until you smash it.

In its second phase, the track splits, with one track going up toward the top of the screen, and the other moving straight forward. Sparkster will remain on the lower track while the train moves along the top, reaching out its segmented extendable arms to hit him for melee damage. Hit the hands to cause damage.

Finally, the tracks join back together and the train comes back down onto your track in front of you. It lobs a series of bouncing blue projectiles that you must avoid while rocket-packing it from behind until it explodes.

Stage 3: Going underground
Sub boss This battle takes place underwater, with a pig piloting a crab suit rising up from below. The mech has 2 claws, but only the left claw attacks, telegraphing by opening just before it is about to strike. The right claw moves back and forth to make it harder for you to hit the pilot, which is the boss’ only weak point.

The battle can actually go several ways depending on how you choose to tackle the boss. If you break off the left claw, the right claw will start to become very aggressive, speeding up and attacking you directly.

If you break both claws, the mech will start shooting wide blue projectiles up at you, which are quite difficult to avoid. You can also opt to go directly for the pilot without destroying either claw.

End boss There is only one sub-boss in Stage 3, but the end boss is tough enough to make up for the absence of a second sub-boss. This fight takes place against a huge mechanical fish over a pool of lava. At the start of the battle, Sparkster is standing on a platform with a wide gulf between himself and his enemy.

Then, the fish opens its mouth and starts drawing the platform toward it. A series of platforms gets sucked toward its mouth, with a row moving along the bottom of the screen and another moving in diagonally from above.

The lower platforms accelerate, moving faster and faster toward the fish’s mouth, making it hard to jump from one to the next. Lava will hurt you if you miss your jump, but the fish will hurt you even worse if you don’t move quickly enough to avoid its mouth.

The upper platforms move at a steady pace, but they’re spread out, appearing in pairs with large gaps between them, meaning that you’ll probably need to jump back down onto the fast-moving platforms at some point. At no point during this sequence can you harm the boss.
Finally, the activity will cease, and there will be a row of platforms on either side of the screen. The fish will rise up out of the center and spew projectiles, along with a few bunches of bananas. Then, ever so briefly, the pilot will hop out of the fish’s mouth and drop back inside again. This is your only chance to deal damage to the boss, as only the pilot can be harmed.


After the pilot is back inside the fish again, the fish descends and the pattern repeats, but in reverse. This time, the fish rises up from the left (woe be to you if you’re standing on the left platform when it emerges), where it draws the platforms toward its mouth. However, this time the top row of platforms is the one that accelerates and the lower platforms move at a steady pace. And this time, the upper platforms are evenly spaced where the lower platforms have gaps between the pairs.

Then, the fish will rise up out of the center again and give you another brief shot at the pilot before returning to the lava and repeating things again from the right side of the screen. This can be a long battle if you miss your opportunity to hit the pilot.
Stage 4: Flying battleship
 Sub boss 1: Captain Fleagle Your fight against Captain Fleagle is a long one, but that’s largely because he is cowardly and continues to run away each time you overcome one of his challenges. Your first encounter the captain at the start of Stage 4, which is where you enter the flying battleship. This is the battleship that Axle used to escape after he kidnapped the princess, and you have come to rescue her.
When you first enter the flying battleship, it seems that your quest has been successful, as the princess stands before you on the other side of a protective barrier. But surprise, it’s Captain Fleagle in disguise. He sheds his dress and fake face with an explosion (!), revealing his Napoleonic garb instead.

From the safety of his barrier, he tosses red balls at you that explode when they hit the ground, and they have a large splash range. Use your sword to deflect the shots back at him, and eventually he’ll get scared and run away, and the barrier will drop, allowing you to give chase.


You pursue the captain up onto the top of the dirigible, fighting the wind and avoiding barrels. As it turns out, Captain Fleagle is the one tossing barrels at you from the front of the ship. Some of them roll along the ground, while others bounce, and getting hit by one will knock you backward.

Fortunately, you can grab hold of the poles holding the propellers and keep yourself from getting pushed too far back. But, if you get hit by a barrel, you’ll lose your grip. If you happen to be on the very last pole on the back of the battleship, you will fly off and fall to your death.

To help you avoid the barrels while hanging onto one of these poles, you’re free to shimmy up and down. The barrels are indestructible, so avoidance is your only recourse, but marching forward is slow work because you’re moving against the wind. Rocket-dashing can give you a bit of extra speed, but you don’t want to accidentally rocket into a barrel, so it’s safer to take things slowly.

Once you do catch up with Captain Fleagle, you can give him a good whack, and he’ll fly off the screen. Did you kill him, or will he return once more? Stay tuned.

Sub boss 2 After Sparkster has dealt with Captain Fleagle, he’ll travel forward past the cockpit (where Axle and the Princess Sherry are seated) and then down beneath the airship. There, he makes his way across a series of rails until he encounters a floating metal winged pig head with a flamethrower coming out of the top. The pigs certainly didn’t have any shortage of ideas when it came to the construction of their war machines.

The pig head moves back and forth and fires flames in a wide swath, though they’re easy to avoid if you just keep moving. Eventually little metal bomb guys start dropping out of the 4 trap doors above, grabbing the rail and moving toward you.

Hit the bombs to knock them down onto the floating pig head to take it down.

End boss: Captain Fleagle At this point, you’ve done away with the bulk of the airship’s defenses, and you encounter Captain Fleagle once more, running around in panic in the cargo hold.

But he still has one last defense, which is revealed when a huge robot – who is dressed in the same Napoleonic garb as Captain Fleagle – breaks through the ceiling. The robot begins tearing the ship apart in its attempts to defeat Sparkster.


First, the robot will drop junked pieces of the ship from the ceiling 3 at a time. Then it will start dancing, swaying its torso back and forth, sending arcs of this same garbage toward you, which are somewhat more difficult to avoid.

Finally, it will open its abdomen and reveal its glowing red power source, which is quite obviously its weak point. It will fire off several large energy balls, followed by a blast of smaller ones. This is your opportunity to rocket dash to its weak point and get in some damage before it starts repeating its trash-tossing attacks.

Once the robot is destroyed, Captain Fleagle goes into a panic once more, but this time he’s trapped and cannot escape your attacks. That does not make him entirely harmless however.

The captain runs madly back and forth, and this time he’ll hurt you if he runs into you. Because he has no other attacks, you can simply stand at the edge of the screen and wait for him to run up to you and then hit him with your sword.

He’ll jump when hit, and he’ll flash for a moment indicating that he can’t cause you any harm during this time. Once he is finally defeated, Axle ejects the cockpit of the airship, making off with the princess as he heads toward the industrial Kingdom of Devotindos, and Sparkster fires up his rocket pack and gives chase.
Stage 5: Kingdom of Devotindos
Sub boss: Pulsating Plasma Blaster This boss encounter takes place at the end of a free flight section, and takes the form of a bipedal mech that rockets up from behind you. It will then turn to face you, walking quickly backward as it unloads a wide barrage of lasers.

Fortunately, these laser patterns have gaps in them that are just large enough for a rocket-powered possum to pass through (lucky you!). The mech can also move to the left side of the screen, facing right, to unleash several sets of lasers.

The boss design is straight out of Gradius with a narrow line of shields protecting the core, which in this case is the pig pilot. Wait for the mech to get in front of you, and then focus your attacks on the shields to bring them down one by one, dodging the lasers as you go. Once you cause enough damage, the mech starts to explode and leaves the screen… only to return in phase 2.

This time, the cockpit is flying on its own without the need for the mech legs. The hovering pod moves around the playfield, extending its 4 segmented arms. The arms reach out and retract a few times, and then start rotating around the pod.

You’ll need to stay between the arms to avoid getting hit, and follow their rotation around until your flight path puts you back in front of the now-open port on the front of the pod. Toss some projectiles down the chute to hit the pilot.

End boss: Axle Gear, the Black Knight This battle begins when you encounter Axle standing in front of a giant mech suit (which looks like a big metal pig). When you teleport in, he leaps in the air and lands in the cockpit, commanding the pig mech to rise up out of the ground, where it towers over you.


And then, it starts chasing you. This is essentially a forced-scrolling area, as falling behind will get you crushed – and instantly killed – by the marauding mech.
You won’t have much time to react to the upcoming platforms, and there are a few sections that require use of the rocket pack, so it’s best to just keep it charged and run. A few gems are scattered throughout to help guide you along the right path, although some trial and error will almost certainly be required.

When you reach the end of the path, you find a second huge pig mech, except this one is unmanned. Hop in, and take control!

From here, the game plays out like a very slow-paced and cumbersome 1 on 1 fighter, complete with a “FIGHT!” command at the start. You can move the mech to the left and right, and it will rise and fall in accordance with its footsteps (which are off the bottom of the screen). This changes the trajectory of your punches somewhat, but not enough to make much of a difference.

The punch speed of both mechs is slow, and it’s easy to see the telegraph, but it doesn’t matter much since neither of them is capable of dodging quickly. You can try to step forward and get in a quick punch, and step back, but often the battle descends into simply trying to hit Axle’s mech more times than it hits yours, without much additional strategy.

The arena is large, but it does have specified limits. If you back up far enough, you’ll find yourself against an invisible wall. Once Axle’s mech is destroyed, he falls out of the cockpit and off the bottom of the screen, and lives to fight another day.

Stage 6: Deep space
 Stage 6 begins with what appears to be a setup for your fight against Emperor Devotindos. The emperor is sitting on the throne with Princess Sherry tied up on the floor in front of him (and this time it’s not Captain Fleagle in drag). However, rather than put up a fight when Sparkster enters the room, Devotindos’ throne slides backward and disappears through a secret passage.
Sparkster cuts Princess Sherry free, and then we see the emperor’s escape pod rising up in the background and flying up into space. The princess works some magic and gives Sparkster free flight, and he rockets off to give chase in a Gradius-inspired free flight section. This time, the entire level is free-flight, and you’ll face off against several bosses.

Sub boss 1 Your first fight is against a green armored robot with a shield. It’s invincible while holding the shield, but soon it will lower its shield and begin firing lasers, and then shoot a green ball with bladed edges.

After completing an attack cycle, he’ll retreat and return to the screen with his shield up to repeat the pattern. He’s vulnerable at all times during the fight, except when his shield is up.

Sub boss 2: Axle Gear, the Black Knight Axle returns, and this time he’s in a space suit, and he has a huge gun. The gun fires a screen-filling laser blast that hurts pretty bad, but it takes a long time to charge up. You can avoid the blast altogether by hugging the top or bottom of the screen, and you can get up close to Axle during this sequence to get in a few strong sword attacks as well.

Also, regular spacesuit-clad pigs fly around during this boss fight, so you’ll need to contend with them as well. However, when Axle fires his huge laser, it kills any of the pigs remaining in the area. And after he fires his laser, he leaves the screen for a moment.

When he returns, he will move quickly around the screen firing heat-seeking missiles at you occasionally. The missiles have moderately tight tracking, but you can shoot them down if they’re in front of you.

With the extra pigs, plus the missiles, plus Axle’s higher speed, it can be difficult to line him up for an attack. You may be better off dodging him until he leaves the screen and returns with his huge laser gun. Once you hit him enough, Axle’s suit will be damaged and he’ll fly away off the right of the screen (but he’s not finished yet!).

End boss Your final space-based battle is against a large, yet oddly scaled ship, and this is a long fight. The ship rises from the left side of the screen, firing projectiles from a pair of forward-mounted turrets along the top. It will continue to move around the screen, opening you up to attack from the other turrets, and often giving you just enough room at the edges to maneuver and dodge bullets. Touching the ship itself drains a lot of energy.


You can attack the turrets individually to destroy them, but your forward-facing attacks can’t reach them all. However, the ship will occasionally disappear and reappear – flashing to show you its location so you can get out of its way before it rematerializes – and it can turn to face the opposite direction while doing so, letting you get some hits in on the other turrets.

Eventually, a hatch opens up along the bottom of the ship, revealing an obvious weak point, and small armored enemies emerge from the hatch and fly toward you, shooting as they go. Destroy the weak point on the hatch, and a new weak point will appear below the cockpit. Destroy that, and the ship will enter its next phase of attack.

The cockpit is now able to separate from the rest of the ship, and the only remaining weak point rests directly behind it. Dodge the cockpit capsule and move around back to get in some hits. After a while, a pair of beams appears that pulls the capsule back to the main ship. The beams don’t hurt, so you can keep dealing damage until the last second.


Once the final weak point is destroyed, the main ship crashes and burns, falling off the bottom of the screen. But wait, there’s more! The cockpit capsule remains, and somehow sprouts huge mechanical legs and arms, transforming it into a mech that can walk through space!


First it attacks with a spread shot. Then it fires a laser that seeks you out, stops and then seeks you again a couple more times. Finally, it extends its hands to the top and bottom of the screen, bouncing a ball back and forth between them.


What ho? The bouncing ball is identical to the weak points on the ship you fought earlier, and it’s the only time during this phase of the battle that you can cause any damage to the moonwalking mech.

Each time you make contact with the weak point, the mech will start hopping wildly around the screen, flailing its arms and legs to cause tons of melee damage. And if you happen to die during this battle, you’ll be sent back to phase 1 of the boss fight and have to start again… but try not to sweat on the controller.
Stage 7: The PIG STAR!
Sub boss 1: Emperor Devligus Devotindos It’s the final stage, and at last you face off against Emperor Devotindos, who has thus far let Axle do all of his dirty work for him; not to mention the fact that he squealed and ran away like a scared little piggy the last time you encountered him. Not this time, though. Now the emperor is ready for a fight.

Oddly, the emperor chooses to fight you in spiked shoulder pads, iron boots, a breastplate, and a codpiece, but his large pork belly is exposed to the world. He bears a cutlass that is capable of shooting angry pig-faced energy blasts at you, alternating between high and low attacks. You’ll need to jump over the low attacks, but the high ones will whiz right past you without the need to duck.

The emperor is immune to all of your projectile and sword attacks, and can only be hurt with a charged rocket-dash. It gets more difficult to line up a dash as the battle wears on, because the emperor can hop from one side of the screen to the other, and he’ll do so with more frequency as he takes more damage. If you get hit by an energy blast, it will interrupt your charge, and if you accidentally rocket-dash face first into an energy blast, you’ll be pushed back, but you won’t sustain any damage.

Finally, once the emperor takes enough damage, he explodes! Ack, pig guts, right? Nope, as it turns out, the emperor was actually a robot! His body parts fuse back together and he starts flying around the room on a rocket pack.


He can fire his feet at you – causing melee damage if they hit – and he uses them as anchors to pull himself down toward you. He has no other offensive abilities, so you just need to avoid this one attack and keep smacking him around until he explodes again.


Sub boss 2: Axle Gear, the Black Knight You walk into a darkened room. Through the windows in the background, you can see asteroids floating past. The lights come on. It’s Axle! And he’s ready to fight you in a 1 on 1 battle.


His abilities are very similar to your own, which is fitting since he belongs to the Black Knights, a group of Rocket Knights that went bad after being corrupted by greed and power. He can jump, swing his sword, and perform a spin attack. However, he does not have your rocket-dash ability. To make up for this shortcoming, he can hover in the air for a while and dive bomb you, and he is also free to move around while performing his spin attack.

Your projectiles are evenly matched, and they will cancel each other out. You can rocket-dash to bring the pain to him, but be aware that the attack does no damage if you hit Axle while he is performing a spin attack. You can, however, hit him with your projectiles while he is spinning

Once you manage to defeat him, Axle will start dashing rapidly and then fly though the air. A huge explosion rocks the place and the left wall is blown out, opening the room to the vacuum of space. There are 3 vertical rails in the room, which are all that’s preventing you from being pulled into space, and to your instant death.

Axle, however, is none the worse for wear, and returns with a rocket pack. He flies around the room (hurting you and knocking you back if he touches you), firing sets of 4 rockets at you. Fortunately, these rockets can be destroyed by your attacks, so hammering the ATTACK button will give you some degree of safety, fending off rockets while getting in a few hits on Axle.

You’ll need to stay as far to the right as possible, because each time you get hit, you’ll be knocked back to the next rail. If you get hit while on the last rail, you’ll be pulled into space. You can recover some ground by rocket dashing to the right and grabbing a better-positioned rail.

When Axle is defeated for the second time, all of his unspent rockets will start falling out of his suit, and he’ll float out into space.

But he returns once more, this time flying around and repeatedly performing spin dash attacks. He is completely invincible while performing one of these attacks, so you’ll need to dodge. You can only hurt him in the brief moment while he’s paused to charge up his next spin dash, so toss some projectiles or nail him with a rocket-dash.

Defeated for a third time, the screen goes white, and Axle floats away once again, this time with blue sparkles following behind him. A teleporter appears at the top of the room. There’s still more to go!


You’ll be teleported to a room where you’ll have to fight off a few robots before making your way to a low gravity room. Here, you can jump very high, and you can charge your rocket pack in midair to get even higher. 1UPs and bananas are tucked away at the upper reaches of your jump height to allow you to build yourself back up, and to teach you the mechanics you’ll need in order to face off against the end boss.

End Boss OK, so you destroyed Emperor’s robot body earlier in the stage, but now you need to take down a huge mechanized egg with the emperor’s face showing on a video screen in the center during a whopping 5-phase battle. The fight takes place in a lowered gravity room like the previous area, and you’ll need to use your increased jump height to take down the boss. Hopefully, you’ve had enough time to practice these new skills, because they are about to be tested in battle.

When the boss first appears, a red button will pop out of the top, indicating its weak point. Easy enough, right? You can just make use of the lowered gravity to hop up and hit him… or maybe not. The egg takes up a good chunk of screen real estate, making the act of dodging around it somewhat challenging. You can certainly get alongside and unleash a projectile attack, but the thing moves too quickly to rely on an up-close sword attack. Also, rocket-dashing leaves you vulnerable once your jet fire runs out, so if you miss your attack, you’re likely to fall back down and hit the egg, taking damage in the process.

To make things more challenging, the weak point button retracts back into the egg, and is capable of emerging from any one of its 8 ports, although it generally appears from one of the 3 upper ports during the first phase of the battle. Once you do manage to deliver enough hits, the egg disappears and returns for phase 2, and this time it’s loaded up with tons of offensive abilities.

First, it can raise 4 antennae in a cross or “X” pattern, shooting electricity in a straight line in each direction.

Second, it can raise an emitter from any one of its 8 ports and launch energy rings from either side.

Third, it can raise all 4 of its antennae on the same side of the egg (whichever side you’re standing on) and shoot electricity from each. Here, the weak point button re-emerges, but it’s difficult to access due to the wide range of this attack. It’s more likely that you’ll simply be dodging the attack and waiting for your next opportunity to strike.

The weak point button always appears on the opposite side of the egg from your position, meaning that you’ll need to dodge around all of its attacks before you can access it. The button only appears for a short window during the boss’ attack, so you never have much time to get to it, and you may need to wait until the various emitters/antennae stop firing before you can access it. Hit the button enough times, and you’ll enter phase 3 of the battle.

Here, the egg will swing a pair of arms around in a counterclockwise fashion, with multiple energy rings on the ends. The movement is somewhat erratic, making it more difficult to dodge. You’ll need to avoid their touch while waiting for your opportunity to strike the weak point button. Fortunately, when you do hit the button, the arms disappear for a moment, so you don’t need to worry about sticking your landing so long as your attack is accurate.

In phase 4, the boss starts firing rings out of each of its 8 ports. It alternates between ports in a counterclockwise pattern, and the rings fly out in a straight line. The button now extends and retracts very quickly over and over, alternating between the various ports and increasing speed as the battle continues. This time, the button always appears from one of the 3 lower ports, so you can focus on dodging the rings and getting in some quick hits.

Once you do, the thing starts to explode, then sparkles, and the screen goes white with a huge explosion. After the explosion, you see nothing of the egg, and the Pig Star itself is exploding. A hole blows open in the wall to the right, leading to a transporter that takes you to an escape pod. But wait, didn’t someone say this was a 5-phase battle?


The escape pod descends down a shaft, and in a cutscene, we see an external view of the Pig Star exploding. A tiny blue dot of light emerges from the chaos and flies off to the left… but a second dot of light follows shortly thereafter. Then the entire Pig Star explodes, bursting into a flash of white and sending a shockwave through space.


We return to see Sparkster descending toward his home planet in the escape pod. But he is not alone… The video screen from the robot egg is following him, with a bundle of broken tubes and wires sticking out of the top. So don’t set that controller down, because the fight isn’t over yet!

This is phase 5 of the same battle, and this isn’t some freebee guaranteed win to build up the tension of the ending; it’s actually a somewhat difficult fight, at least until you have learned the proper pattern for avoiding its attacks. And if you screw this up, you’ll be sent all the way back to phase 1 of the fight, which will likely be answered with your own much-deserved blood-eyed screaming and cursing.

This type of design was prevalent during the 8- and 16-bit days, but was greatly diminished in the generations that followed, leading many latter-day gamers to wonder why there was ever so much talk of controller-tossing. Well, this was it. Limited lives and continues, a high difficulty level, and no such modern luxury as save states, or even saving your progress at all. Making it to the final boss in many games of this type was challenging enough, and the tension felt during these battles was often quite severe.
Combine that with the fact that many such end bosses could drain your entire health bar in 3 or 4 hits, and you have a number of gamers who were sent back to the title screen just a few seconds into the encounter, perhaps not even learning enough about the boss’ moves to beat him next time, and certainly unaware of whether another phase or two remained afterward.
And so Sparkster descends, the docile look on his face coming nowhere near the tension on the player’s as he fights to steer the pod to safety. Sparkster has no offensive abilities during this sequence, and simply needs to stay alive long enough to break the planet’s atmosphere.

The computer screen will fire off rows of rings, dive bomb, and flail its arms around to cause melee damage. There is a clear pattern to the attacks, but you won’t have much time to practice because it doesn’t take many hits to destroy your pod and send you back to phase 1 of the battle.

Hold out long enough, however, and you’ll start to see the planet rise up in the background. And then the screen will start to turn red to simulate the heat of reentry. And finally, the computer screen will begin to disintegrate under the searing heat, crumbling to pieces aside your pod. Now it’s safe to set your controller down (and start breathing again) as you enjoy the ending sequence.


HERITAGE
Why this game should be part of your 2D heritage:
- Loads of unique gameplay that changes several times during each stage
- Varied and interesting enemy design that requires you to change up your attack strategies
- Different attack power when using projectiles vs. direct sword contact vs. rocket-dashing, leaving plenty of room for strategy, particularly against bosses
- Plenty of humorous moments throughout the cutscenes and during the levels themselves
- Constrained environments limit the use of the jetpack
- Lots of things will kill you without warning, requiring memorization
- The 1 on 1 mech fight against Axle, while cool in concept, is extremely cumbersome

3D AFTERMATH
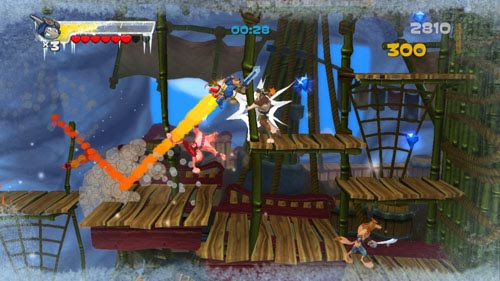
After more than a decade of absence, Sparkster finally stepped back into the light. Rather than develop the game with one of their in-house teams, Konami farmed the development out to British studio Climax Entertainment. The game was titled Rocket Knight and was released as a downloadable on XBLA, PSN, and PC in 2010.

The game takes place several years after the events of the original series, and Sparkster has apparently settled down, as evidenced by the fact that he’s living on a small farm with his wife and child at the start of the game. However, the wolf army (the enemies from the SNES version of Sparkster) soon begins invading, and Sparkster must once again don his rocket knight gear and head in to save the day.
Rather than reviving the detailed sprite art and charismatic character designs from the previous games and bringing the game back to life as part of the “Rebirth” series, the title was developed as a 2.5D game, with low-poly 3D graphics. The lack of sprite art, or even detailed 3D models means that a lot of Sparkster’s character-defining occasionally-goofy-but-also-pretty-badass attitude is lost in the new game. This is especially noticeable given that all of the cutscenes are played out in pantomime (as they were in the previous games), emphasizing the fact that the 3D models are far less expressive than their 2D counterparts.

The game is also slower-paced less difficult than the previous games in the series. The overall lessening of the difficulty is certainly understandable given the contemporary market, but the pacing also removes most of the intensity that fueled the original games. The level design is less intricate, enemies move more slowly, your speed during free-flight sections is considerably reduced, and boss battles are not as complex. This is particularly true of Sparkster’s continued encounters with his rival, Axle (spelled “Axel” in this game), which were once some of the most intense battles in the series.
The game does stay true to its predecessors in terms of the controls, however, borrowing moves from each of the prior games in the series. The rocket pack now charges automatically, but the player gets to choose when to perform a regular rocket-dash versus a Burst Drill corkscrew attack. The standing spin-dash also returns.

Players still have access to both a sword attack and projectiles, but this time they’re assigned to different buttons, and using the projectiles drains a small amount from your rocket meter. Actually, all of the moves except the sword attack drain some of this meter, with projectiles draining just a little, rocket-dashing and spin attacking draining a bit more, and the Burst Drill attack draining more still.
The biggest advantage to having an ever-charging rocket meter is that you can pretty much perform a rocket-dash whenever you like, giving you much more freedom to use rocket pack for environmental navigation. Also, since a rocket-dash doesn’t drain the entire meter, you can use it several times in a row (although not multiple times in midair like in the Genesis version of Sparkster). You can also have some control your movement while falling (again like Genesis Sparkster). Most of the earlier levels don’t require heavy use of the dash moves, but later levels do require some more advanced rocket-packing to get around.
There’s also a new move called a Burst Assist, which lets you get a little extra distance on your jumps by letting out a quick rocket blast. This isn’t a height-increasing double-jump, but rather more of a Yoshi-style assist that lets you get a bit further along on the horizontal plane.
The game is fairly short by modern standards, with just 4 levels. However, an added focus is placed on scoring and collectibles, encouraging players to replay the levels. At the end of each level, you’ll be graded on the number of items you collected as well as your overall score. Further emphasizing this gameplay is a combo meter that increases every time you collect a gem or attack an enemy. String together multiple collectibles with a few enemy attacks and your combo meter will start to climb, so it’s possible to do a “score run” where you look for the best combo line to rack up the biggest score. So, while earlier levels don’t require much advanced rocket-packing to beat, you will certainly need to use these skills if you want to come away with a top score.

This same design applies to the free-flight sections as well, where timing your attacks will cause explosive items to blow up nearby explosives, potentially leading to a huge chain of damage. Sparkster is also given a new charge attack here that allows him to unleash a wide beam and take down multiple enemies in a single shot.
While Climax Entertainment managed to employ the basic mechanics that qualify this as a Rocket Knight game, they still missed the mark on making a title that feels like a Rocket Knight game. The game simply does not have the energy and intensity of the previous entries in the series. The game also overlooks the best thing that it has going for it, namely its lead character. Most of Sparkster’s charm, charisma, and general badassery have been lost with the translation to 3D. After all, this isn’t just a game about a guy who can jump and dash; it’s a game that stars an armored possum knight with a sword and a rocket pack strapped to his back.


2 comments:
Great review and walkthrough! I just beat Rocket Knight Adventures and was looking around to see if any reviewers were as frustrated as I was. I really appreciated the artistic design in the game, but I wasn't expecting the Ninja Gaiden style cheapness. I'm glad you didn't gloss over this at all. I'll definitely be checking out more 8-bit Horse!
I'm glad you enjoyed the article. We've gotten away from covering classic games lately, what with all of the new 2D game releases, but Rocket Knight definitely stands out as a unique title and one of Konami's forgotten hits. ...And the American release is pretty darn tough.
Post a Comment