
A game by Game Freak for GBA, originally released in 2006.

CONTEXT
If you’ve never heard of Game Freak, that’s probably because you haven’t been on a decade-long quest to capture elemental animals to become the best trainer the world has ever known. That’s right, Game Freak is primarily known as the “second party” developer behind the core (i.e. handheld) games in the Pokémon series.

Prior to the Poké-splosion, Game Freak developed the NES action/puzzler Quinty (Mendel Palace in the U.S.), followed by GameBoy/NES puzzle game Yoshi, and then the notable Genesis action-platformer Pulseman, which was published by Sega, but could only be played on U.S. Genesis systems via the Sega Channel, as the cartridge never made it out of Japan.


But once the Pokémon games hit big on the original GameBoy – and essentially revived the console single-handedly – Nintendo had only to keep their golden chalice held beneath a near-constant stream of liquid money as they continued to greenlight releases of the franchise for each of their consoles. Game Freak’s primary occupation was to continue the development of the series on handheld systems.
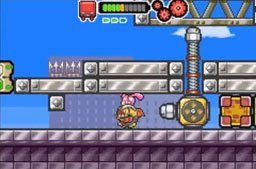
However, in 2006, well after the launch of the Nintendo DS, Game Freak developed a new game for the GBA. Coming from a background of colorful character-based games, Game Freak created platformer starring a pink-haired girl named Jill who was the pilot of a Drill Dozer. To enhance the entirely drill-based game, the cartridge was designed with a built-in rumble pack which vibrates when the drill is used.

Published by Nintendo, it is but one of a handful of oversized cartridges released for any handheld system, and it is identical in size to the Yoshi Topsy Turvy cart, which has a built-in motion sensor. Rather than the traditional charcoal color of GBA cartridges, Drill Dozer was released in red (the Yoshi Topsy Turvy cart was a 2-tone green and gray). Also a rarity, the game is optimized for the GameBoy Player, so that the GameCube controller vibrates to give the same effect as playing the game in the GBA with the rumble pack enabled.

The game was originally released in Japan under the name Screw Breaker, but that title was changed to Drill Dozer for its western release, for what should be obvious reasons.
PREMISE
 In addition to the instruction manual, the game comes with a mini-comic called A Girl and Her Dozer which details the events leading up to the start of the game.
It shows Jill getting called on her way home from school with the news that her father has been ambushed by Skullkers and badly injured.
Jill, upset about her father’s injuries and the fact that her mother’s red diamond was stolen, fires up the Drill Dozer and heads out after the Skullers.

Prologue, from the mini-comic:
Great treasures are scattered around the world: Jade masks resting in a [sic] ancient tombs. Chests of gold coins sitting at the bottom of the sea. Glittering jewels secreted away deep in jungle temples.
The Red Diamond is one of those epic treasures. Thieves and treasure hunters around the globe have spent lifetimes searching for the stone said to grant the owner any wish.
Luckily, the Red Dozers found it first. Though it’s true that the Red Dozers are a gang of thieves, they have good hearts. Instead of abusing the power of the Red Diamond, they watch over it.
Before long, whispers circled around the criminal underworld that the Red Dozers had found the priceless gem. Eventually, word got out to Croog – the evil boss of the Skullkers. The Skullkers are a nefarious gang of thugs that hide behind the pretense of being a harmless corporation. Once they heard that the Red Dozers had the precious diamond, they plotted their heist for months, waiting for the perfect chance to swipe their precious treasure.
The mini-comic also features profiles of the game’s major characters.

From the instruction manual:
Jill may look like an average schoolgirl, but she just happens to be the daughter of the big boss of the Red Dozers, a friendly gang of thieves! Growing up with the Red Dozers meant learning skills other kids never pick up. When she was just a toddler, she was already stomping around in a powerful Drill Dozer robot! The thieving life was good until the evil Skullker gang thugs ambushed her dad and even pilfered with [sic] her precious Red Diamond! While the big boss recuperates, it’s up to Jill to lead the Red Dozers, demolish the Skullkers with her Drill Dozer, and get her Red Diamond back!

CONTROLS

 Action
 Jump
Jump Spin drill counter-clockwise
 Spin drill clockwise
Press DOWN on the D-pad to crouch
Press DOWN and A to dash

PREAMBLE
Here we have a game that looks and feels very much like it stepped right out of the cartridge slot of a Super Nintendo. The game ships with a lengthy full-color manual (and a mini-comic) detailing all of the available moves, as well as game functions and tips. These are interspersed with screenshots and sprite art, and the whole thing has a generally upbeat style with swirly arrows and such. It is definitely in line with the manuals of other Nintendo-published titles, particularly those of the 8- and 16-bit generation.

But this is no SNES game. It was built well after the 3D generation had devoured the gaming landscape and obliterated practically every single sprite in existence. The crushing wave of the 3D flood brought with it numerous tutorial levels and general hand-holding that was meant to escort gamers of practically any skill level from the beginning of a game to the end.

Thus, while Drill Dozer may have all of the appearances of a SNES game, it falls firmly on the side of the latter-day heavily-guided experience. In addition to game-pausing tutorials that explain each function as it becomes available, boss fights are frequently preceded with – and punctuated by – interruptions explaining the exact method needed for completing the challenge. Mess up during a fight, and often you will be greeted with a message from one of your NPC friends explaining what you did wrong and how to correct it.

Game environments are structured in such a way that you’ll need to explore their various nooks and crannies for powerups, chips (money), and energy (health). This will often require heading down multiple paths and even doing some backtracking. However, the design of the levels is done in such a way that there is really only one path through (until you receive some new drill bits, but more on that later), and that once you complete a section, it will usually be blocked off so that there is no chance of backtracking into an area where you don’t need to be. There are a small handful of puzzles that must be solved before continuing, but the solutions are almost always in the same room, and usually just a few steps away.

All of this guidance is certainly in-line with Drill Dozer’s contemporaries, but it does lessen the feeling of freedom, exploration, and the act of trying-and-failing-and-trying-again that was prevalent in its predecessors. The game will absolutely, at no point, leave you with the feeling that you don’t understand what you need to do in order to proceed. As such, you are often simply following the game’s instructions, moving from point A to point B, and drilling what you are told to drill when you are told to drill it.

This is not to say that the game is entirely without challenge, but one can’t help but wonder what this game would have been like if it had come out in 1994 on the SNES instead of 2006 on the GBA, because the level design and constant assistance lessens the explorative nature of the game and the player’s overall feeling of accomplishment. The core mechanics are unique and enjoyable, the boss fights are interesting, and you basically use every single variation of the gameplay mechanics available to you by the time you reach the end of the game. Those are the hallmarks of solid game design. But the packaging does obscure the gift within.

MECHANICS
From a presentation standpoint, a great deal of attention was paid to character design, which is true of most of Game Freak’s games, as they not only programmed the Pokémon games but they also drew the bulk of the illustrations for each character. This design is evidenced by the inclusion of the mini-comic and the art design of the main characters and bosses, which all have a unified and very colorful look. Also, everything is animated in a cartoony fashion, so powering up your drill will actually cause the Dozer to bend and stretch in ways that are unrealistic based on its actual form, but the animation is exaggerated in order to give you a greater feeling of its movement and power, and to retain the not-so-serious tone.

This feeling of slightly-exaggerated goofiness is perpetuated throughout the game during between-level cutscenes, and by your interactions with NPC’s and bosses, who are often very animated and spurt out humorous or childish quips. This is less true of the game environments, although there are some funny touches, like having Jill drill through a locker room and break toilets, leaving behind jets of water squirting up from the ground. Also there are a few funny signs to be discovered, such as one in the first area which reads: “Attention, Skullkers: Business minions must always put on a fake smile. Thug minions are required to frown and look intimidating at all times.”

In the opening of the game, extra care is taken to ensure that the player understands that Jill and the Dozer are two separate entities. So, while the Dozer does have legs and acts as an extension of Jill, it is basically a mech being piloted by a little pink-haired girl. To establish this fact, the game’s opening sequence sees Jill dropped down a hole where she is ejected from the Dozer. At no point in the game are you made to control Jill outside of the Dozer, but it offers the player a chance to see Jill as herself, standing next to the machine that she controls. Of course, she immediately jumps back inside, and the game gets underway.


There are a few other points of separation as well. For instance, when you encounter a switch, the Dozer cannot interact with it. Instead, Jill actually climbs out of the top of the Dozer, pulls the switch, and then drops back inside.

There are also a couple of instances where Jill will hold an object over her head and carry it to its destination. During this time, she can still move the dozer around the environment, but she cannot use the drill, dash, or jump functions (presumably because her hands cannot access the controls). If you stand still and look around, Jill actually stands up and leans over the edge of the Dozer to get a better look at her surroundings (which allows a bit of independent camera movement).

The Dozer itself moves with a fair amount of weight, which can be seen through minor purposeful sluggishness in its movement and jumps. Similar to the mech in Cybernator, mechanical noises accompany all of the Dozer’s movements, from loud metal clangs when walking, to noises when jumping or dashing, to the sounds of the drill spinning, drilling through an object, or being repelled by an unbreakable object.
The Dozer has no weapons of any kind, outside of the drill itself. As such, this is an entirely melee-based affair, and you will need to get up close and personal with every enemy, obstacle, and boss in the game. You can drill up, down, left or right, and you also have a dash move that you can perform by ducking and pressing the JUMP button. This sends you very quickly to the left or right, even over pits, but it has a moderate recovery time that discourages players from just dashing through every level. Often, this maneuver is used to access hard-to-reach areas.

You begin the game with only one gear. Holding down the R button spins the drill clockwise, and holding down L spins it counterclockwise. You can stop drilling at any time by letting off the button, but even if you hold the button, the drill will eventually wind itself all the way back down on its own. As such, stronger obstacles and enemies will have to be drilled multiple times in order to be overcome.
Drilling is accompanied by a meter that occupies a ton of onscreen real-estate, basically acting as an overlay that shows the current power of your drill. As you become accustomed to the timing, and the audible cues regarding your drill speed, the interface becomes unnecessary, and unfortunately it can obscure some of the onscreen action.

 Later, you’ll find a drill block that drops a new gear, which allows you to shift up into 2nd. This is done by revving the drill all the way up in 1st gear, and then hitting the button again when the screen reads “SHIFT UP”, which will kick you up into 2nd gear. (Again, audible cues keep you from having to actually look for the words to appear, and with practice, you’ll know when the right time to shift has come.) This allows you to sustain your drilling for a bit longer, destroying stronger blocks and enemies in a single attack, but it will eventually wind back down to a stop as well.
Finally, collecting another gear will allow you to shift into 3rd, and the game music will speed up. You’ll need to rev up through 1st to shift into 2nd, and then do the same to shift from 2nd into 3rd. In addition to the increased drill speed, 3rd gear never winds down. Once you are going full blast, the drill will keep spinning until you let off the button. This allows you to plow through enemies and obstacles, and is a necessity for completing the game’s many boss encounters.

At the end of each level, you will lose your extra gears, and be taken back down to 1st. As such, the bulk of the exploration you do in each level will be in the name of tracking down those 2 additional gears. The environments are designed in such a way that it is impossible to make it through to the end of the level without first upgrading to 3rd gear. This means that you’ll be performing roughly the same quest in each level.

In case it’s not abundantly clear by now, the core mechanic of the game centers around drilling. Every obstacle you encounter in the game can be overcome with the use of the drill, and every enemy can be destroyed by it. While you basically only have two drill controls (spin clockwise or counterclockwise), there is an awful lot of gameplay that can be derived from this.
 There are numerous drillable objects in the game, and each has a life bar which shows how much damage it can sustain before being destroyed. They come in many different forms, so we’re not going to spend time looking at all of them. However, there are two varieties of brick that are a bit special. The first is a standard brick wall that either takes multiple 1st-gear runs, or one shift up into 2nd gear.
 The second type of brick is a bit stronger, and requires that you power all the way up into 3rd gear to effectively destroy it.
 There are also two types of blocks that are indestructible at the start of the game. The first is a dull gray block, which can only be destroyed once you secure the Hard Bit from the store (more on that later).
 The companion to the dull gray block is the shiny silver block. These blocks can only be destroyed by purchasing the more-expensive Mega Bit, which cannot be gained until you have completed the game. And of course, there are numerous block types that are just outright indestructible, and are meant to impede your progress or force you to solve a puzzle in order to overcome them.
 Some blocks can only be destroyed from a certain side. These blocks are made of an indestructible metal on 3 sides, with the remaining side appearing in yellow. The player is required to position himself accordingly in order to drill in from the top, bottom, left, or right. Often these blocks will prevent you from accessing an area from one direction, but will give you shortcut on your return. Or, more often, they require that you drill through them in a maze-like pattern to make your way through to the other side.
 Timer blocks disappear when drilled but reappear after a short time. The basic timer block can be destroyed in 1st gear, and will reappear after a few seconds. However, it will not reappear while you are standing on the spot that it once occupied. So, you can use this as a strategy for drilling through a vertical stack of timer blocks, standing on one empty spot, drilling up into the next block, and then jumping at the right time so that the block beneath you re-forms where you were standing. This strategy is necessary for completing some of the later levels.
 There is a variation of the timer block which is gray, and requires that you shift up into 3rd gear to easily destroy it. These appear very late in the game and are often used for gap-crossing, since using 3rd gear to drill through a block in midair will cause you to continue moving forward, allowing you to drill into the next block even if it is not directly adjacent. Remaining in 3rd gear without letting off will allow you to cross long gaps with interspersed blocks of any type, not just timer blocks. This also works when leaving one drill tube and going straight into the next.
 Screw blocks appear in many varieties throughout the game. Basically, you have one side with a screw that needs to be tightened or loosened (by spinning the drill clockwise or counterclockwise). Doing this will have the opposite effect on the other exposed screw, causing it to extend or retract accordingly. Some of these blocks are placed at 90 degree angles, providing a temporary platform to access another area, while others simply prevent you from accessing a blocked off section.
After screwing or unscrewing the block, you’ll have a few seconds before the block returns to its previous state. You can use this as an opportunity to run through a newly-created opening, or to stand on the retracted screw and wait for it to extend, potentially allowing you to reach a new area.
 Gelatin blocks are one of the more interesting obstacles in the game. When you drill into these blocks, you’ll stick to them, with your drill imbedded in the jiggly substance. However, if you reverse gear while stuck in the gelatin, you will bounce backward. The speed and distance of your bounce is determined by how fast you were drilling, so a bounce from 3rd gear is significantly longer than a bounce from 1st. And since you can turn around in midair, it’s possible to triangle jump your way up through a section by bouncing back and forth between multiple gelatin blocks.
Advanced brick-hopping techniques are rarely required in the standard levels; more often the block is simply there to prevent you from reaching a new area before you have a high enough gear. Challenge levels, on the other hand, are heavily laced with these blocks, at which point it becomes very important to know which gear to be in, and when it’s better to land on top of brick rather than to drill into it.


 A far more obvious gatekeeper block is the self-repairing barrier. These barriers are used solely to keep you from moving on until you have searched the area thoroughly and received the next gear upgrade. They come in 2 forms, one which can be destroyed by using 2nd gear, and another thicker one that can only be destroyed using 3rd gear. Since you start each new level from 1st gear, you will be in near-constant drill bit fetch mode, and will encounter these barriers often.
 There are a couple of different types of socket lifts in the game. One has an opening facing in a single direction, which allows you to drill into it and stick for as long as your drill is running. These lifts are set up on tracks, so you can drill in, hitch a ride, and then drop back out on the far side.
 The second variety is a lateral lift that has two openings, one on either side. These are also usually hooked up to a track which carries you through the environment. On these lifts, you have the ability to switch from one side to the other by pressing left or right on the D-pad, and you will need to do so in order to avoid obstacles along the track. There is no penalty for missing your opportunity to switch sides, except that the lift will not continue moving forward. So you can switch sides at any point, or if your drill runs down, you can just drop off and try again. Like the gelatin blocks, you can reverse gears to eject yourself at a distance proportionate to the gear you were in at the time.

 Drill tubes, or screw tunnels if you prefer, appear in both red and blue varieties, and these tubes become more frequent as the game goes on. The red tube requires that you spin your drill clockwise in order to pass through, while the blue tube requires counterclockwise movement. When they’re first introduced, you’ll have a low gear, and will be made to slowly pass through them in spurts. Later, once higher gears are obtained, you will be flying through them rather quickly.
You will eventually encounter situations where a red tube will open up at the mouth of a blue tube, so you’ll need to switch your drilling direction before proceeding. You can move both forward and backward through tubes by switching your drilling direction. To further complicate matters, some tubes will have a purple Pac-Man-esque creature made from electricity, which will follow you through the tube and try to chomp you. Only by moving quickly can you escape its attack.


 Toward the end of the game, you’ll encounter drill tubes with cylinders, which are known as “cannon clamps”. Each of these clamps is marked with a number and cannot be passed unless you are in the correct gear. Hitting a clamp in the correct gear will propel you forward very quickly, but hitting it too high or too low will send you backward just as quickly. When being propelled, you only have the ability to change gears; you can not slow down or reverse direction.
You’ll need to pay close attention to your surroundings in order to look ahead and determine the gear required in order to pass. Not long after learning this technique, the game will start to toss higher and lower gear clamps at you, as well as mixing red and blue tubes.

 There are a few other obstacles in the game that can be interacted with or overcome with your drill, such as ratchet points that allow you to drill clockwise or counterclockwise to open a door. These also appear later in the game as “drill spinners”, which you can drill into and then quickly reverse gears in order to be propelled straight up into the air.
In addition to these, there are 3 instances where you will be faced with entirely new abilities and controls for the Dozer, which present some new challenges.

At the end of the boss fight in Area 4-2, Jill is captured. Area 5-1 takes place in a prison, where Jill is locked in a cell, and the Dozer has been deactivated and placed in a storage area. The Dozer suddenly self-activates by utilizing the mysterious power of the Red Diamond, and sets out on a player-controlled quest to locate Jill. During this time, the Dozer’s abilities are reduced. It cannot jump as high, nor can it dash.

However, the unpiloted Dozer now has the ability to deactivate itself and slide into the background. This has roughly the effect of the tanooki suit in Super Mario Bros. 3, in that enemies will ignore you, and you cannot be harmed. This technique is used to avoid the numerous moving lasers that line the environments and which will cause the red blocks along the floor to disappear when activated, usually dropping you to your death (well, to a small health loss and a respawn anyway).

You rescue Jill fairly early in the level (before getting the 2nd gear). She hops in and everything returns to normal. You’ll have to backtrack through the laser-protected area to escape the prison, but since Jill has the ability to pull switches, she can deactivate them entirely.

Another control change occurs after you pick up the propeller from the little old ladies in the submarine in Area 3-2. This allows you to enter the water, and your Dozer will transform into a submarine-like craft (Jill even gets a cute little scuba mask). Here, rather than using the D-pad to move the Dozer around, you are completely dependent on your drill for propulsion.

Spinning your drill clockwise in one direction (up, down, left, or right) causes you to move forward in that direction for as long as the drill is activated. So, in lower gears, you’ll need to continuously rev your gears up to navigate the environment, while gaining 3rd gear allows you to go full blast, but only in one direction. Since you’ll be affected by inertia in these environments, it’s important to not just blindly charge forward. Careful adjustments must be made to turn corners, attack enemies, and avoid obstacles.

There are 3 types of obstacles in the water-based areas:
 If you drill into a bubble, it will pop and send you flying away in a straight line, without the ability to control your Submarine-Dozer. This can be used to your advantage and allow you to travel quickly in one direction, but it can also can send you straight into the path of enemies, or into one of the environment’s more dangerous obstacles: spikes. Bubbles re-form soon after popping.
 Multi-directional spiked balls line the walls of many sections of the underwater level, forcing you to be very careful with your navigation. Combine this with nearby bubbles or strong currents, and you can often find yourself being pushed uncontrollably toward them. Fortunately, since spikes are undrillable, you can use your drill to slam straight into a wall of them, and you’ll simply bounce back. This is a good technique to learn in order to avoid taking some cheap hits as you navigate the environment, and it lets you move about more quickly.
 Finally, the underwater levels have sections with strong currents. Some of these currents will be restricted to a straight line that pushes you through a narrow area (often with spikes along the sides or at the end), but you’ll also encounter areas where there are multiple currents moving in several directions, placed at perpendicular angles. These currents will shove you quickly through the environment, and around corners.
Your only defense against a strong current is to drill in the opposite direction. 1st or 2nd gear will slow you down a bit, while 3rd gear lets you defy the forces and move slowly in the opposite direction. But it takes time to switch up through the gears, and you can only drill in one direction at a time, so you’ll find that this is not an effective strategy against the multi-current areas. You can, however, turn your Dozer at a 90 degree angle and escape the current you’re stuck in, and move into a side passage.

The other area where you’ll encounter a new control scheme is Area 4-2. Previously, when you fought the little old ladies in the submarine, you gained a propeller that allowed you to move underwater. This time, the sisters return in a flying machine. Defeating this boss grants you the air propeller, which allows your Dozer to take to the skies.

Controlling the Sky Dozer works similarly to controlling the Submarine Dozer. Drilling clockwise spins the propeller and moves you forward. However, you can only propel yourself upward, or hover in place by holding both triggers. The D-pad lets you angle the Dozer to the left or right, allowing you access through tight – and often enemy infested – areas.

Controlling the Dozer in this manner requires a bit more finesse, since you’ll often need to “fan” the R button to get some height, and let off before hitting obstacles or enemies. Letting off of the gas entirely can mean falling all the way back to the bottom of the section. And, you can’t start turning at an angle until you’ve left the ground, so you either need to get good at the controls quickly, or spend several frustrating minutes drilling and falling repeatedly as you scoot along a little bit at a time.

You’ll be controlling the Dozer through a largely vertical environment, with sections that require you to move quickly to the left or to the right, either to avoid enemies or navigate around obstacles. There are lots of wrench boxes lying about to lure you into spending a bit of extra time looking around and fighting enemies, but you are certainly free to just blast to the top of any vertical-only section without interacting with anything. You really only need to take your time and learn the controls during the horizontal sections, which require a fair amount of precision control. It’s worth the practice, however, as the end-level boss requires you to navigate 3 separate spike-lined mazes filled with machines that are meant to thwart such an attempt.

In addition to these alternate-control areas, there are a few advanced techniques to be aware of that can assist you as you progress through the game. For one, your drill can deflect normal enemy bullets (not missiles or bombs). So, rather than attempting to dodge every projectile you see, it is often in your best interest to simply drill straight toward the baddie firing at you.

Secondly, you should always keep in mind that you can reverse gears at any time in order to dash backward quickly. This also allows you to slow down in drill tubes or fight against the current in underwater sections.
Finally, once you start to drill, you will be locked in the direction you were originally facing. This means that you can retreat from an enemy or boss but leave your pointy parts aimed at the bad guys to either deflect their bullets or give them a face full of spinny doom when they come charging into your big red bit.

The levels in Drill Dozer are pretty long for a handheld game. However, you have the ability to save your game at any time, and return later with the same amount of health and gears, and you’ll be at the entrance to the last room you were in. This also means that you can save your game just as you enter a difficult area or a boss fight, and simply reload your save if you fail the challenge, which further reduces the game’s difficulty.

Or, if you do manage to get your Dozer destroyed, you have the option to buy your way back into the game by spending 50 chips on a continue, and you can pick up where you left off. So, while you don’t really have infinite continues, the save and continue system essentially give you as many chances as you’ll ever need to complete a stage. This all but eliminates situations where you get killed and have to restart a level entirely from scratch.

At any time, you can leave the area you’re in and return to the overworld map. You can also use the map to return to any area that you’ve previously entered. This allows you to do a bit of chip-hunting to buy health upgrades or drill powerups. Once you have the Hard Bit and/or Mega Bit, you will find that you can get to new places in previous levels, which allows you to take shortcuts, and to unlock some of the game’s many hidden treasures.

There are 31 treasures hidden throughout the game, located in green treasure chests. These are completely optional and do not offer any type of monetary reward or powerups. However, they do affect your end-game rank, and collecting them will allow you to access certain unlockables, such as wallpapers, alternate costumes for Jill (only on the interstitial trailer screen, not in-game), and the ability to play through the levels with all 3 gears from the start.

Each of the 6 areas also has an additional hidden level, which can only be accessed by purchasing a map at the shop. These levels offer more of a challenge than the standard ones, and are meant for players who have mastered the controls. Passing through each of these areas successfully will reveal at least one of the game’s treasures. However, treasures are also hidden within the standard levels as well. The between-level interface allows you to take a look at which treasures you have collected and how many remain in each area.

The game also features an area called the Red Dozers’ Training Course, which acts a practice area to try out the Dozer’s controls. This area is available after you complete Area 1-1, and it contains most of the obstacles that you will encounter in the game. This is also the place to which you’ll return if you wish to open up any of the game’s unlockables after collecting the treasures.

 Besides the hidden treasures, there are only 2 types of pickups in the game: chips and energy. These are often found in wrench blocks, but chips are also dropped by enemies, and from standard and hidden drillable blocks throughout the levels. They will disappear after a few seconds if uncollected. Chips are the game’s currency, and come in denominations of 1, 10, and 30, depending on the size of the chip. Energy restores some of your Dozer’s health, with a small one restoring a few units, and the large ones restoring a full bar.
You can also purchase additional energy tanks in the shop, each of which equates to a full life bar, similar to the MegaMan games. Picking up excess energy restores not only your life bar, but the energy tanks as well. Unlike the MegaMan games, however, all of your energy tanks are fully replenished each time you exit to the overworld map.

You can’t buy items or upgrades right away. The shop does not become available until after you have completed world 1-2, and even then, the only available items are energy tanks. The Hard Bit becomes available after Area 3-2, and the Mega Bit only becomes available once you have completed the entire game. Maps become available toward the end of the game, with the first map (of the Skullker Hideout) coming up for sale after you complete Area 4-2.

Finally, before we get to BCE’s and Bosses, we want to take a quick moment to point out that many of the game’s standard enemies are designed around specific uses of the drill mechanic, and several are designed in such a way as to prevent you from exploiting a single strategy for all enemies. For instance, there are some enemies that periodically become electrified, requiring that you wait for the proper timing to strike, rather than just ramming it into 3rd gear and charging ahead.

There is also a jumping dog that’s hard to get a hold of, due to its speed and agility. Once you do manage to start drilling, however, it can jump away, preventing you from running up through all of your gears and killing it in one shot, thus forcing you to chase it around again.

There are shielded enemies that can only be attacked from a certain direction, rolling boulders that can only be drilled when they slow down and stop spinning, and mummies that dispense poisonous gas clouds when destroyed. Like most games, Drill Dozer is still stuffed with standard die-when-hit enemies, but peppering in some of these more difficult foes certainly adds a layer of strategy, and prevents players from simply firing up the drill and marching forward through every level.


BASTARD CLASS ENEMIES (What's this?)
Ghost In level 3, you’ll encounter several ghosts that will hound you as you move through the area. In some locations, you’ll be forced to fight a ghost (or two) before you are allowed to move forward. The ghost dies instantly when you drill it. However, it then turns into 4 floating wisps which fly up to the top of the room. Their movement is completely relative to yours, so you can’t just drive away and avoid them, and they’re invincible.


After they hover about for a bit, they’ll start dive bombing you, sometimes one at a time, and sometimes several at once. You’ll need to watch their movements and run, jump, or dash at the right time to avoid them. And of course, as you’re dodging one, you’ll need to keep your eye on the others, since they can dive bomb you at any time. In one instance, you’ll be stuck in an area where the only escape is to duck down and dodge back and forth beneath some platforms to avoid their ethereal sting.

Targeting Drone This enemy first appears as a miniboss in area 4-1, but it appears over and over again throughout the last half of the game. This symmetrical enemy has weak points on each side, and laser emitting spikes on its top and bottom. But, it can flip in 90 degree angles, changing the direction of its weapons and the location of its weak points quickly and frequently

Since it’s a flying enemy, you’ll be beneath it in most of your encounters. It will fly over you, targeting above and below, then flipping 90 degrees and targeting to the left and right. You’ll need to get under it when it’s aimed to the sides, chase it, jump, and drill it before it changes direction again and aims down at you.

When the enemy locks onto you, the target will turn red, and the robot will start firing wide lasers straight down. You can still run, but it will follow you for a few seconds before losing the target lock and resuming its normal pattern. When you first encounter this enemy, it will appear on its own, but later in the game you’ll fight it while navigating obstacles and fighting other enemies, and even encounter more than one at a time.

There’s one particularly nasty section just after your first Targeting Drone encounter where you’re fighting on top of a moving train, not only dealing with enemies pouring in, but also dodging and drilling objects as the train rushes down the track. By the end of the level, you’ll be contending with regular enemies, oncoming objects, and fighting a Targeting Drone simultaneously, which will pound you silly if you don’t deal with it quickly.

Another notable encounter occurs toward the end of Area 4-2, when you’re equipped with the air propeller. Since you move so slowly, it’s very difficult to get in close for a kill before the Targeting Drone can lock onto you. However, its primarily in place just to make it difficult for you to access all of the wrench blocks in the section, so you can just run full blast and fly right past them. This is far easier than trying to take them head-on.

BOSSES
Bosses in Drill Dozer are entirely pattern-based affairs, so winning is a matter of recognizing the pattern, waiting for the telegraph, and then striking. In many cases, your NPC friends will tell you the exact strategy required to beat a boss. That said, many of the bosses provide some inventive uses of the drill mechanic that are not used elsewhere in the game. In addition, the game is chock full of minibosses as well, each of which requires its own unique strategy, and often makes use of a certain environmental layouts to add to the challenge. One funny point to mention is that the destruction of all end-level bosses is punctuated by a ludicrously large anime-style explosion.

Area 1-1: Skullker Hideout
Boss The first boss is a Skullker piloting a robot with a rocket launching tube in its nose. It will fire a couple of rockets at you, which you must dodge (drilling rockets will cause them to explode). After firing a volley, the robot’s rocket tube will remain open. Drill into the tube, and shift up into 3rd gear for maximum damage. After a couple of 3rd-gear stompings, the bad guy’s robot will fall to pieces.


A pair of these robots show up in the next level as a miniboss (see below), and the boss also shows up later in the game as a standard enemy.
Area 1-2: Skullker Factory
Miniboss 1 The first miniboss is a robot hooked to an overhead rail. It sends a series of claws across the top of the screen to drop enemies on you. After a while, the robot will lower its body down, exposing its weak point. You can drill up into it as soon as it is exposed, but it is much better to destroy the surrounding enemies first, since contact with them will cause you to break free from the drill point, and the boss will retract its body and start the cycle again.

But you can’t wait too long. If you don’t hit the body quickly enough, it will pull back up, and you will have missed your opportunity to cause damage.

Miniboss 2 The second miniboss is simply a pair of the end-bosses from Area 1-1, with one standing on one side of the screen, and one on the other. They will take turns firing volleys of rockets at you, and if you play by their terms, you’ll be dodging a lot. If you manage to destroy one before the other, the remaining Skullker will get angry and start firing extra rockets at you.

However, if you remember your techniques, you can actually take them down very easily. Simply dodge the rockets from one side and start drilling into the nose of that robot. While you’re doing this, the other robot will begin firing rockets at you. Keep shifting up and watch for him to stop firing. When he does, quickly shift into reverse, and you’ll be ejected from the first robot, and sent flying through the air toward the other. You can turn to face him and start drilling without taking any damage. Turn and burn!

Boss Here you’ll face off against big bad Croog in his Scorpion Dozer, which has a drill bit for a stinger. When the stinger comes toward you, you can drill back into it, which keeps you from taking damage, and also stuns Croog after a few seconds.

Once he is stunned, the Scorpion Dozer’s mouth will open and begin dropping walking bombs (somewhat similar to Bob Ombs), which wander across the screen, stop, and explode. Obviously, drilling them would be bad, so you’ll need to jump over them, head for the Scorpion Dozer’s mouth, and drill for all you’re worth.

Once the scorpion tail is destroyed, the robot will sprout legs, regain a full life bar, and start walking toward you, dropping bombs with greater frequency. This makes the bombs harder to avoid, but the formula for success is the same: drill the Scorpion Dozer’s open mouth until it crumbles. Croog will exit the robot and fly away with your precious red diamond.

Area 2-1: Art Museum
Boss Prior to this boss encounter, you will find a disabled police robot in the basement with a loose screw. This gives your NPC buddies the chance to chime in and explain that backing out the screw will disable the robot, which is the basis for the upcoming boss fight (and several future ones).

Soon after, you’ll face off against the real thing: a police robot piloted by an officer who is attempting to protect the Art Museum from your thievery. This robot is decidedly more active than the one in the basement; it can charge at you and punch pretty quickly.

Again, your NPC friends tell you to watch out when the robot’s fist starts glowing red, and to dodge that attack. If you jump at the right time, the police robot will miss with its swing, causing the torso to spin around, and dizzying the pilot. This gives you the opportunity to hop up and start drilling out the linchpin screw that holds the whole (cheaply-constructed) robot together. A few such attacks, and the robot will fall apart.

Area 2-2: Museum Vault
Miniboss 1 You finally encounter Detective Carrie herself, and she’s acting a bit strangely. She and several police officers begin chucking EMP bombs from a high ledge, which parachute down toward you. Fortunately, there’s a fountain nearby, which is hooked up to a drill point (how convenient).

Strapping into the drill point and spinning your drill in either direction allows you to move the water spout to the left or right, hitting the bombs and disabling them. After a while, the police will run out of bombs, and you’ll be free to continue, using the water spout to reach a higher ledge and exit the area.

Miniboss 2 The gaming world cannot get enough of its giant enemy crabs, especially giant enemy robot crabs. This is a pretty interesting fight, since you’ll be fighting this enemy from the confines of a drill tube. This means that you’ll be restricted to moving left or right, and you can only drill to the right. Before the fight, the boss shows you its telegraph, which is that either its left or right eye will flash, followed by an attack from the corresponding claw which dips down into the drill tube.


The crab can run left or right above the tube, and you drill back and forth to avoid its claw attacks. Following this, the crab will lean over and look down into the tunnel, leaving its head/eyes exposed to your attack. So, if you dodged to the right, you’ll just have to sit and wait for him to resume his pattern. If you dodged to the left, it’s time to shift up and start drilling into his tasty brain meats.

Boss Here you’ll be facing Detective Carrie once more, and now she’s acting really strangely, which is apparently due to the fact that she’s possessed by the power of the yellow diamond (yes, the Red Dozers are after their red diamond, but they keep finding diamonds of different colors in their quest). This time around, Detective Carrie is piloting an upgraded police robot which has a pair of giant handcuffs built into its waist.

The battle takes place inside the vault, with stacks of gold bars lining the room. Occasionally, some of the stacks will collapse, revealing enemies behind. You’ll need to drill these enemies quickly so that you’ll be prepared to dodge the police robot’s attacks.

Detective Carrie will toss the handcuffs at you, high or low, and you’ll need to jump over or dash under them as they fly past. The high toss can also boomerang back around and hit you from the other direction. Getting hit causes damage and cuffs you to a nearby pole, and you’ll need to drill your way out. You’ll also miss accessing the robot’s weak point, located on its waist, which will become exposed when the handcuffs are tossed.

Once you have drilled your way through the robot’s waist, the torso will break off and begin flying around the room (with a refilled life bar), propelled by a jet blast from its underside. It moves very quickly and dive bombs you to attack, but the jet port is its weak point. So, if you just let it sit on the far side of the screen, you can aim your drill upward when the robot swings in for an attack.

Your drill bit will get stuck in the port as Detective Carrie pilots the robot upward, spinning uncontrollably. Reaming out her jet hole a few times returns the detective’s sanity and grants you possession of the yellow diamond. (There is no moral to this story.)

Area 3-1: Kuru Ruins
Boss Area 3 has a more mystical theme, and sees you facing off against mummies, skeletons, and Bastard Class ghosts in order to reach the end-level boss. And rather than encountering some huge robot, you find a pile of ruins with a gnarled tree growing out of it. A blue light enters from the side of the screen and sinks down into the ruins.


Once the energy ball has properly nested, the structure comes to life, producing a long multi-segmented arm with a spiked ball on the end. The arm will slide back and forth across the screen, occasionally pausing to drop down and try to crush you, and sometimes moving off of the screen and then moving quickly back in a horizontal motion. In most cases, once the spiked ball hits the ground, the spikes will disappear, allowing you to drill into it.

As you drill, you’ll be pulled back up to the top of the screen, and you’ll need to reverse your gears to bounce away, timing it just right so that you fall down to where the energy ball is, at which point you’ll need to aim downward and start drilling. You’ll also need to keep in mind the higher gear you’re in, the further back you’ll fly when reversing, so it’s best to just stay in 1st gear, and reverse just before the engine winds all the way down.

Cause enough damage, and the energy ball will fly away. The ruins will once again become inanimate, though still slightly creepy.

Area 3-2: Sunken Ruins
Miniboss In this battle, you’ll face off against an old blue-haired lady, and her pink-haired twin sister. They pilot a robot equipped with a propeller that allows it to move underwater, but it can also hop out and fight on land. Both sides of the room have water pits, and the submarine will alternate between each side, rising up and jumping out of the water.

On land, the robot will shoot a series of 3 bullets toward you, which are blockable with your drill. After the attack, the robot’s one single screw will be exposed (similar to your first fight with the police robot), which you can drill until the sisters hop back into the water.

Lather, rinse, and repeat, and you’ll be granted the propeller, while the sisters escape (to return again later). The propeller allows you to pilot your Dozer underwater and access the rest of the level.

Boss Since the preceding area was entirely underwater, you’ll also find the end-level boss fight to be underwater. The energy ball has returned, and this time it has possessed a school of fish, turning them into a giant fishy monstrosity. The glowing sphere acts as the eye of the fish.


The fish alternates between shooting energy blasts or rocks in your general direction. You can drill up or down to dodge the energy balls, but you’ll want to drill directly into the rocks, causing them to bounce back toward the fish.


Once it has been hit with a couple of rocks, the big fish will split back into a bunch of tiny fish, which line up against the side of the screen and then charge quickly toward you. After they cross the screen, the energy ball will appear for a few seconds, unprotected. Drill it for a while, and the fish will return to its giant form and the cycle will repeat. Later in the fight, the smaller fish will be able to dash across the screen twice instead of once, and the orb will begin showing signs of stress. Fillet this guy to score the blue diamond.


Area 4-1: Metal City
Miniboss 1 This is the Targeting Drone which is covered in depth in the BCE section above.
Boss Detective Carrie is back, with yet another new-and-improved police robot. This fight takes place in a Nintendo Stadium, which is reminiscent of the many old Nintendo sports games on the NES. This is one of the more interesting battles, but it can also go on for a bit too long.

This fight is a game of hot potato, and it all comes down to timing, and paying careful attention to the colors of the rockets being fired. The robot will fire a rocket at you, and you’ll need to drill into the rocket to repel it. But it has a timer, so whoever has the rocket last will get caught in the explosion. If it’s you, you’ll take damage; if it’s the police robot, it’s midsection will be exposed while Detective Carrie is momentarily stunned, and you can drill for damage.

At first, the rockets move slowly and have a 10 second timer. You can basically just repel them back and let Detective Carrie absorb the damage. But as the battle goes on, rockets can come out with shorter fuses (down to 2 seconds), so you’ll need to decide when to just drill the rocket in 1st gear, or when to hold it for a few seconds by shifting all the way up into third. And of course, you’ll need to keep an eye on the timer and dodge any rockets that come toward you with just 1 second left on the clock, especially as Detective Carrie starts to hold on to rockets for a few seconds before sending them back toward you.

The other thing to watch for is the color of the rockets. Blue rockets can only be repelled by spinning clockwise, and red rockets are repelled by spinning counterclockwise. Mess this up, and you’re rewarded with a face full of napalm. And the color can change each time Detective Carrie fires, so you’ll need to stay on your toes, as reaction time (or lots of energy tanks) is the most important skill you’ll need to win this part of the fight.

Even after this lengthy sequence, the fight is not over. Once you cause enough damage, you’ll be facing off against a robot torso again, and as before, its underside is its weak point. However, instead of just flying around the area, it will continue to fire rockets at you, which must be returned as before. When Detective Carrie dodges, she’ll pilot the robot to the top of the screen and eventually drop down on you, allowing you to access the jet port weak point. The robot can land on either side of the screen and fire rockets at you once more. Persistence, timing, and a stack of patience will get you through.

Area 4-2: Metal City Skyline
Miniboss You face off against the blue- and pink-haired sisters again in Area 4, but now they’re piloting a flying robot instead of a submarine. The flying robot has a magnet on the bottom which drops bombs. During pauses in the bomb-dropping, you can drill up into the bottom of the robot. However, this does not reduce its life bar. Instead, it will cause the robot to start bouncing around the room.

You’ll need to dodge the robot and wait for it to eventually crash to the ground, at which point you can drill it to cause damage.

There are 3 phases to this battle. After the first phase, the walls will close in a bit, and the sisters will start dropping bombs 3 at a time. Then, the walls will close in further, making it even more difficult to dodge the bouncing robot.

Winning the battle gives you the air propeller, and the sisters escape once again. The air propeller allows you to take to the skies for the remainder of the level.

Boss The end-boss is a weather satellite known as The Drizzler, but it has been modified by the bad guy scientist to utilize the power of the red diamond, and it has therefore mutated and turned eeevil! The battle takes place in 3 stages, each of which will begin with The Drizzler drawing a line of spiked walls through the level. You must fight your way through the spikes to reach the satellite.


In the first phase, a spike maze is created and lined with smoke-dispensing turrets that obscure your view. The turrets constantly move along the spiked walls and cause havoc to your visibility. Once you reach the satellite, you’ll still be surrounded by smoke, but you can basically drill unfettered. Cause enough damage, and the maze will disappear, and a new one will be drawn.

The second maze has a different layout, and is lined with fans. These fans will turn on and off periodically, pushing you toward the spiked walls. This time, you’ll have to be more careful when drilling the satellite, since the fans can still cause some trouble.

The satellite’s third redraw is not a maze at all, but rather a straight shaft leading up to the top. But the sides of the shaft are lined with turrets that send bolts of electricity across your path. You can’t just fly straight to the top, because getting hit by the electricity will cause you to drop back down. And fanning the right trigger won’t get you anywhere either; rather you will need to use both triggers to hover.

You can drill upward, hold both triggers to wait for an electrical bolt to pass, and then keep moving upward. At the top, additional turrets await, meaning that you can’t just deliver constant damage to the satellite, or else you’ll be zapped and fall back down again. Once you have beaten all 3 phases of the satellite… you’ll get to fight it again.

This time, there is no maze, just The Drizzler moving back and forth across the top of the screen dropping debris (breakable with your propeller), and occasionally unleashing a large and extremely powerful blast of energy straight down into the ground. Wait for the energy beam to stop, and get in some quality drillin’ time. Its movement speeds up a bit as it goes, but the pattern is otherwise the same.

Rain on its parade to get your red diamond back and return The Drizzler to its former self. But, in the between-level cutscene, Jill is captured by an imposter Red Dozer truck (it’s a red bull truck… no not that Red Bull), and she is thrown into Clink Prison.

Area 5-1: Clink Prison
Miniboss 1 The first miniboss is a Skullker riding a hovering scooter, which follows you down a corridor. You will encounter this enemy twice during your trek through the Clink Prison. It can shoot poison darts in rapid-fire, and instead of just taking damage, you’ll be instantly transported back to the previous checkpoint (with a small health loss) after sustaining a hit. So, you have to survive the entire onslaught without getting hit even once.

Your drill can destroy the Skullker’s shots, but there isn’t much of a gap between each volley. However, it’s important to remember that you can drill in one direction and move in another. Since you’ll have 3rd gear by this time, you can just shift all the way up through the gears and start walking backward as the enemy moves toward you.

For the second encounter, walking backward isn’t enough. You’ll come across gaps filled with electricity, which have the same effect as being hit by a poison dart; namely, you’ll be transported back to the previous checkpoint and have to start fighting the Skullker again. So here, you’ll need to wait for the Skullker to stop firing, then quickly turn and jump or dash across the pit. Each pit is larger than the last, with the final pit requiring a dash (the ceiling is too low for a jump that far) with precision placement since the gap is just short of your full dash distance.

Miniboss 2 For your second Miniboss encounter, you’ll find yourself locked in a room facing off against the prison defense system. It seems that the Commissioner has been working with Croog all along and he’s been tasked with putting a stop to your advancement.

Doors drop down on either side of the room, blocking the exits, and timed bombs begin falling from 2 dispensers mounted to the ceiling. You need to defuse them before the timers count down. Each of them has a screw which can be pulled out, using clockwise movement to disarm the red bombs, and counterclockwise for blue. Defusing them all allows you to exit, where you’ll take on some more Targeting Drones before taking on the level’s final boss.

Boss Detective Carrie comes to your aid, sensing that there is something wrong with the Commissioner, and she helps you to open the door that leads to your confrontation with him.

The Commissioner pilots a huge mech with 3 attack types. From its head, it fires rockets off the top of the screen, which fall down around the area where you’re standing. With its right arm, it can fire a laser beam straight across the area, either high or low. And its left arm is equipped with a claw that can lurch forward or smash down from above.

The area has 3 platforms which you can use to dodge enemy fire, but falling rockets will temporarily destroy the platforms, allowing others to continue downward to meet you.

After dodging some laser and missile attacks, the claw arm will rear back and prepare to strike. Drill upward to knock it backward into the robot’s head. The claw will fall off, opening a tunnel which leads inside the robot’s body.

Inside, there are 3 paths. One leads up to the head, one to the left arm, and one to the right. The place is filled with drill tubes and cannon clamps, and you have only 50 seconds to reach one of the 3 engines powering the robot, which directly correspond to each of the robot’s attack abilities. For instance, if you take the top path, you can destroy the engine that allows the robot to fire missiles. If you fail to destroy an engine in time, you’ll be ejected back onto the battlefield and will have to repeat the cycle. Successfully destroying the engine means that you’ll be ejected back onto the battlefield, but the robot will lose one of its attack abilities.

The real trick to making it through these areas is to pay close attention to the numbers on the cannon clamps. Early on, you’ll have lighted signs in the background telling you whether you should shift up, shift down, or remain in the same gear. Later, you’ll just have to keep an eye on your environment. Each time you enter a cannon clamp in the wrong gear, you’ll be pushed back and lose precious seconds.

Red drill tubes will often open up into blue ones, so you’ll need to be mindful of your drilling direction. If you need to buy some more time, there are bundles of wires spread throughout the area which will put a few seconds back on the clock when drilled.

Keep at it until all 3 engines are destroyed, and kablooey, nothin’ left.

Area 6-1: Drill Missile
Boss In Area 6-1, Croog decides to take the fight to you by sending a Drill Missile straight to the Red Dozer base, which is also Jill’s home, and it’s where her father is recovering. The Drill Missile will burrow slowly down into the ground, and your goal is to travel down through it and disable it before your entire base is destroyed.


The journey to the tip of the Drill Missile plays out like a standard level, but you can actually see the dirt rising up in the background as the drill burrows its way into the earth. New obstacles are mines which are hidden behind drillable bricks. A few seconds after being exposed, these mines will explode, exposing any surrounding mines, which will also explode. These chain reactions will also destroy the otherwise impenetrable silver blocks that are interspersed throughout the area.

Once you get down to the tip, you’ll find a big red screw waiting for you. You have 3 minutes to unscrew it, and the room will slowly fill with more and more wall-hugging electrical charges which will interrupt your drilling if they hit you. Drill counterclockwise until the system is disabled.

This will initiate a self-destruct sequence, where your only goal is to run up through various drill tubes to outrun the oncoming explosion. When you reach the end, you’ll find that you still have one more challenge awaiting you… an overheating reactor that powers the Drill Missile. If you don’t direct the coolant in time, the missile will explode and all will be lost.

The room has two cooling towers, but only a single chip to control them. You’ll need to swap the chip back and forth between the left and right towers, while monitoring the heat levels. Keep the levels balanced until the challenge ends, and you win.


The missile will be sent flying backward toward Croog’s base. But Croog isn’t done yet…


Area 6-2: Croog’s Doom Dozer
Boss From out of the ground rises Croog’s Doom Dozer, a giant mechanical monstrosity that towers over buildings and crushes everything beneath its mighty wheels, causing huge blue explosions as it moves.

In a final dramatic act, the Red Dozers head straight for the Doom Dozer, crashing their trailer directly into it, but not before launching Jill and her Drill Dozer into the air.


Like the Drill Missile level earlier, this fight takes place entirely onboard the Doom Dozer. You’ll see buildings rolling by in the background as you take on the most elite of Croog’s forces until you reach the supports holding up the Doom Dozer's main tower.


Drill through the supports to bring the tower down and destroy the Doom Dozer completely. Sound too easy? Well it is. Croog is down but not out, and you’ll need to go up against him in one last fight.


Following the destruction of Croog’s mobile death machine, Jill is ejected from her Drill Dozer once again. When she jumps back in, the Dozer all but falls apart, losing not only its 2nd and 3rd gear – as it does between all levels – but 1st gear as well, thus completely disabling its drilling capability. And Croog is still ready for a fight.

Croog hovers in the air, surrounded by a shield, and will toss volleys of energy toward you. All you can do is dodge.

Eventually Croog will dive down to hit you directly for melee damage. Then he will stop and get ready to charge across the screen at you. With her Drill Dozer nearly destroyed, Jill only has one attack remaining…

She rears back her tiny fist and waits for Croog to charge at her. Release the button with the right timing, and Jill will punch Croog right in the face, sending him down for the count. This is another example of the developer’s attention to character design, since it is ultimately Jill herself – not the Dozer – who must put a stop to Croog’s evil plans.


As a result, Croog loses the black diamond, and his mask! The ending sequence wraps everything up fairly neatly, and the credits roll. Cue jolly sitcom laugh, and fade to black.

HERITAGE
Why this game should be part of your 2D heritage:
- Numerous creative ways to use the drill to take on obstacles, enemies, and bosses
- Practically every drill-based gameplay variation is used at some point, and special challenge levels are available for more skilled players
- Enemy variety requires use of drill in creative ways
- A great deal of attention was paid to the character designs, and the style, tone, and humor are kept light and consistent throughout
- An overabundance of handholding and overall lack of difficulty in the game proper
- While there is variety in the environments, enemies, and obstacles, the game is mechanically very similar from start to finish, and the primary gameplay elements are repeated throughout
- Drill overlay sometimes obscures onscreen action


1 comments:
Great comprehensive write-up. Drill Dozer is a hidden gem for the GBA library. It is not without its downfalls, but overall it's a charming, well-rounded platformer.
Post a Comment