
A game by WayForward for Wii, Xbox One, PS4, Vita, PC, and Switch, originally released in 2009.
 CONTEXT
Today, we are simultaneously blessed and cursed with “reimaginings” of popular entertainment. Rather than making a direct sequel to a pre-existing franchise, a reimagining is an attempt to retell the same story in a more modern context, using modern-day technology. And generally, these reimaginings take certain liberties with the original narrative and other core elements, which is often done to make things more plausible, but other times just to make them different enough that they aren’t outright remakes. Sometimes this is successful, and manages to capture the attention of a whole new audience while keeping fans of the original happy, but other times – especially since the original is usually an established favorite – the newer version fails to live up to its lineage.


This type of thing has been common in the film industry for quite some time, and usually a couple of decades manage to pass between one telling of the story and the next. Until recently, the game industry was a bit too young for this to occur with any kind of frequency. Yes, it did happen occasionally, with titles such as Super Castlevania IV which retold the story of the original Castlevania with enhanced graphics and gameplay (and Mode 7 scaling and rotation!). But now that the industry has aged a bit, it has its own 20-year old stories to be retold, and the practice has become more commonplace. Modern technology often pushes these retellings into the 3D realm, but some stick to their 2D roots, such as the retelling of Metroid via Metroid: Zero Mission. Others offer a mix of new 3D technology with the 2D gameplay intact, such as the Bionic Commando 2.5D iteration, Bionic Commando: Rearmed.


A Boy and His Blob: Trouble in Blobolonia was released on the NES in 1989. It was the brainchild of David Crane, who was the creator of Pitfall! and a co-founder of Activision. The game featured a shapeshifting blob that could alter himself into a number of useful objects depending on the flavor of jellybeans he was fed. These ranged from ladders to reach higher areas, to bridges to cross gaps, and even a blowtorch that could burn through spider webs. This was pretty unique gameplay, especially for 1989.
The game was essentially one huge level (until you left for Blobolonia), which required a fair amount of backtracking, with very deliberate movement and use of various blob forms. Jellybeans came in limited quantities and searching for treasure was a requirement, since that was the only currency by which you could make purchases in shops. Also, the blob wasn’t very independent, and couldn’t chase after jellybeans (you had to throw them right at him), and he could get left behind if you journeyed too far ahead. The game saw a GameBoy sequel about a year later, titled A Boy and His Blob: The Rescue of Princess Blobette, after which the series lay dormant for many years until WayForward created an update for the Wii in 2009 (and later ported to other platforms), simply titled A Boy and His Blob.


The reimagining of A Boy and His Blob brings back the core gameplay of a blob that can transform into various objects when fed different flavors of jellybeans. The blob itself has also been given a bit more intelligence, and he is much more adept at navigating the environment on his own (which is significantly more complex). The player also has the ability to toss jellybeans much more freely, and the blob will attempt to retrieve them from wherever they are thrown.
Jellybeans are infinite, giving players more freedom to experiment with puzzle solutions, and searching for treasure is now entirely optional, although it does lead to rewards for adept players. The game is certainly more action-based than the original, but progression in most areas still comes down to discovering the correct solution to the environmental puzzle, and selecting the correct blob form. The visuals have also been given a tremendous upgrade, as WayForward opted to present the game in entirely hand-drawn 2D artwork with a high number animation frames, particularly in bosses. Some homage was paid to the original game with the return of several blob forms, and some very similar environments.


PREMISE
From the instruction manual:
When Blobolonia is threatened by an evil emperor, the blob comes to earth looking for help. Instead, he finds a young boy. Help the blob take down the Emperor’s wicked minions in order to dethrone the evil Emperor terrorizing Blobolonia and establish a friendship with the blob that will last a lifetime.
CONTROLS
The game can be controlled using either the nunchuck and remote configuration, or just the classic controller. For the sake of simplicity, only the classic controller configuration is illustrated here.
B Jump / Action
A Toss jellybean / Alt Action
Y Jellybean menu
X Call blob
(These actions are also mapped to each of the 4 shoulder buttons)
Additional functions, such as the HUG and SCOLD buttons are mapped to the D-pad.

MECHANICS
The pre-title introduction to A Boy and His Blob consists entirely of hand-drawn animation. It features a spaceship leaving from a jellybean-shaped planet (Blobolonia) and heading out into space. Of course, it crash-lands on earth in spectacular fashion.


Then we see an action montage showing the titular boy and blob going up against a number of shadow creatures. It showcases a several enemy types and blob forms, and even the game’s 4 bosses.

When you start the game, you will find the boy lying in a bed within his extremely large treehouse. Outside his window, the ship crash-lands and the boy decides to pull on his backpack and head out to investigate. As you head through the darkened wood, you will find that the little boy is extremely underpowered. He can run, jump, and push objects, but he has no offensive abilities of his own. He’s also not particularly fast, he can’t jump very high, and he can be killed instantly by touching any enemy that he encounters.

Once he reaches the crash site, he meets up with the timid blob creature, who turns out to be friendly and a bit on the cuddly side. The boy quickly befriends him and gives him a nice big hug. In fact, the boy will hug the blob on command, as one of the buttons on the controller is mapped to the HUG function. You may feel free to whack the HUG button as often as you wish throughout your adventure, although it has no effect on the gameplay. There’s also a SCOLD button on the D-pad, which allows you to chide the blob and force him to stay put.

The boy leads the blob back to his hideout, and the adventure begins. There is no explanation as to why the boy is alone in the treehouse, or why he should be able to venture out into the wilderness on his own. In fact, there are no adult characters (or any other human characters, for that matter) in the game, despite the fact that you will occasionally encounter objects or structures that were clearly built by full-grown humans. Granted, this is a fantasy-based adventure, so the presence of adults isn’t necessary from a narrative standpoint. However, the game does take place in the “real” world, and the boy has been left entirely to his own devices as he traverses the countryside on a dangerous quest that could get him killed.

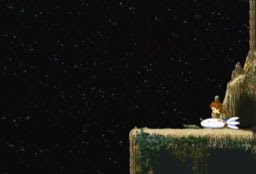
In fact, that’s one of the oddities of the game… The boy can die. It’s one thing to have a child or child-like character die in a 2D sprite-based game. The kid just falls onto his back, or opens his mouth in surprise and drops off the bottom of the screen, often suggesting that he was merely stunned.

Not here. When the meets his end, he will fall to his knees and slump over, his lifeless body smacking against the earth. Sometimes he’ll be facing toward the background, and other times toward the screen. It’s very strange to see a child meet a violent end, and certainly odd to see a hand-drawn cartoon child drop lifelessly to the ground. It’s actually a bit disturbing. The boy in the original game was considerably older and less innocent-looking, and his deaths were portrayed by simply having him fall onto his back.
You’ll get to experience death time and time again, but checkpoints are very frequent, so you’ll never lose too much ground. While there is some basic platforming to be had, most of the progression comes from solving the numerous puzzles throughout the game. Each puzzle requires a that a certain blob form be used to progress. Later in the game, you may have a couple of different options for solving a puzzle, but for the most part, you’ll just need to figure out which form you need to get past the obstacle at hand.

There are numerous enemies in the game, all of which are shadow-creatures, with the exception of the yellow bird (see the BCE section below). Some of them can be killed by using one of your blob forms, others will need to be dropped down holes or otherwise lured away from the boy, and still others actually operate as a means for you to progress through the level, provided you understand how to interact with them properly. For instance, most creatures will be squashed if you drop an anvil on their heads, but a couple of them will be able to hold it on their heads and keep walking, allowing you to hop on for a free ride.

There are 40 levels in the game, and another 40 challenge levels. The treehouse in the first area acts as the hub, and you select the desired level from a map that is posted on the wall. Once you complete the entire first area, you will move on to the next, and you will encounter a new hideout, with a new map and levels to explore. The second hideout is a large, empty house. Again, it’s not explained why the boy is there by himself, and it certainly adds to a feeling of emptiness and loneliness throughout. The blob truly is your only friend.

The game has 4 main areas, so you’ll eventually have 4 different hideouts, and you can move freely between each of them. The levels in each area must be completed in order, but once you have completed a level, you can return to it whenever you wish. There is no need to backtrack in this game, but each level does hold 3 treasure chests, and finding all 3 is the secret to unlocking the challenge levels. If you missed a chest on your first time through a level, you can go back and try to find it.

There are some clues as to the chests’ locations. Depending on the environment, these may be fireflies or floating multi-colored wisps nearby. These will lead you directly to a chest, or lead you toward a path that will take you to one. Most chests are hidden just off the beaten path – and some way off the beaten path – and require some creative use of the blob forms to reach.

There are also a few enemies who have chests hidden inside of them. These enemies will have sparkling light rising up from them. Kill the enemy and it will drop the chest.


Whenever you encounter a chest, the blob will open his mouth and swallow it, and when you get back to your hideout, he will regurgitate it onto the floor (eww).

Each chest you find will open itself and a ball of light will emerge and move to another section of your hideout and become a new object, such as a decorative piece of furniture, or even such odd things as a dinosaur skeleton.

If you collected all 3 chests, the object will be fully-created, and each competed object corresponds to a challenge level. These levels are entirely optional, but completing challenge levels opens up rewards, such as character artwork, level design concepts, boss fight layouts, and even a sound test.

While it may seem that these challenge levels were meant to artificially extend the length of the game (which is quite long on its own), they’re actually a bit different from standard levels and offer their own unique puzzles. The biggest difference is that challenge levels tend to focus on just a single blob form – or sometimes 2 or 3 forms – and require that you use it in a variety of ways in order to complete the level. These levels are shorter than a standard level, and typically more difficult. There are no checkpoints, so you have to make it to the end in one shot.

While some of these are just shorter and harder versions of standard levels, others are designed to let you really play around with some of the blob forms. Playing through an entire level on a hippity-hop or a rocket is a refreshing change of pace from the frequent bean-tossing and form-switching that you’ll find in a standard level.

There are 15 blob forms in total, and the bulk of the gameplay is hinged in the use of them. The blob will change forms depending on the color of jellybean he is fed. In the original game, the jellybeans each had a particular flavor, and you had to remember what each flavor did. These usually had alliterative names or a play on words, so they weren’t too difficult to keep straight. For instance, you had a licorice ladder and an apple jack.

Here, each jellybean is simply a different color, and highlighting it shows you what form the blob will take on when he eats it. The different forms are introduced slowly, and you’ll never have access to all 15 at once. Instead, you’ll have a wheel with up to 8 jellybeans pre-loaded onto it. Most levels will have fewer than 8, and the loadout changes with each level, ensuring that you have the ones that you’ll need to complete the challenge. Unfortunately, this means that the position of these 15 possible jellybeans will be different with every level, making bean-switching a bit tedious, since you’ll need to figure out where each form is located for every level that you play. This will be readily apparent to any player within just the first few levels into the game, since switching between forms is the crux of the gameplay and occurs with great frequency.


Once you’ve selected a jellybean, you hold down the THROW button and you’ll see a line indicating where it should land. You can toss a jellybean in an arc to just about any point on the screen, and the blob will chase after it. When he reaches the jellybean, he will swallow it and transform. He will retain this form until you call for him, at which point he will transform back into his regular blobby self and return to you.

In the original game, you just whistled for the blob, but here the boy has a few things that he can shout to get the blob to return to him. The tone of many of these sayings is very demanding, and sometimes demeaning. The boy treats the blob more like a pet – and sometimes like a misbehaving pet – rather than a sentient being from another planet, especially given that the boy will supposedly “establish a friendship with the blob that will last a lifetime”, according to the instruction manual. This is even more troublesome given that the blob seems to be doing everything in his power to help the boy and to please him, but he is being constantly ordered about and scolded (there’s even a button on the controller for this). Regardless of how well things are going, the boy may take a harsh tone with the blob to get him to come to his side, and the blob will always happily oblige.

Throughout much of the game, signposts will show the preferred type of blob form required to get through the area. This is especially true in earlier areas, but they do show up later on as you gain new forms. Also, if the blob is not able to transform into a certain shape in the area where the jellybean was tossed, he’ll resume his original form. For instance, a hole won’t work on a thick floor, and a trampoline won’t work on an angled surface.

 The ladder is one of the staples of environmental navigation, and it was in the original game as well. We’re not going to detail each of the colors of the jellybeans in the new game, but it’s worth pointing out that the developers did go so far as to have the black jellybean create the ladder, which corresponds with the licorice ladder from the original game. Other jellybeans also retain their colors/flavors from the original game for all recurring forms (e.g. the jellybean for the jack form is green, to correspond with the apple flavor from the original game).
Drop a black jellybean and the blob will turn into a ladder which extends up to the next platform, or – in a few cases – extends the ladder downward from a higher platform. The ladder has a fixed height.

 In some respects, the hole is the opposite of the ladder. It allows you to drop down one level, provided that the spot where you threw it isn’t too thick, and it only works on horizontal surfaces. However, there is quite a bit of strategy to it, and you’ll be using it in a variety of situations throughout the game, especially since it works on enemies as well. There are plenty of situations where you just need to get around an enemy, so you drop your Acme Portable Hole™ onto the ground in front of their patrol route, and they’ll drop right through. Call the blob, and the hole disappears, allowing you to pass unmolested.
You can also use this strategy to drop a jellybean down through the hole and call the blob, at which point he’ll drop down to the lower level and eat it. Or, you can get enemies to fall through the hole and then push a rock in to squish them (and sometimes reveal a treasure chest).

 This is the ultimate “go anywhere” tool for the blob. By turning the blob into a balloon, he can pass through walls and move to any height, essentially allowing him to move to any spot in the level where you’re standing. You’ll have this jellybean available in most levels, and all of the challenge levels. However, there’s also a trick that allows you to use the balloon form at any time you wish. If you rapidly tap the CALL button, the boy will call for the blob 2 or 3 times, and then whistle. When the boy whistles, the blob will turn into a balloon regardless of where he is in the level, and move to the boy’s side. Calling him again returns him to his native form.
This is especially handy for the numerous instances where you have to might have to hold a door open for the blob, or where waiting around for him might slow you down or place you in danger. The blob will also automatically turn into a balloon if he falls into a bottomless pit, or if you get to the end-of-level golden jellybean and he cannot reach you directly.

Also, in the final area, you can toss a jellybean to the numerous imprisoned blobs that are spread throughout the levels, and turn them into balloons. This allows them to escape their cages and fly away to safety.

 The trampoline lets you jump to incredible heights. In fact you can jump so high that you’ll kill yourself if you miss the trampoline on your way back down. By timing your use of the JUMP button, you can increase your height with each jump, eventually reaching the highest point in most levels. The boy even has a different falling animation once you get to a certain point, so it looks even more dangerous when you start to get really high. There is an accompanying semi-panicked yell as well, which lets you know when you’ve reached a height that will kill you.
The trampoline is used to uncover numerous hidden chests throughout the game, which would normally be out of your view off the top of the screen. Watch for fireflies or other floaty things to clue you in to these locations.

There are a couple of alternate uses for the trampoline as well. First off, you can toss it down into a pit of spikes and use it to bounce up and over them without getting killed. And you can also place one under a jumping or falling enemy (such as the jumping starfish-like enemies) to send it bouncing upward. Sometimes this just gets the enemy onto a higher platform and out of your way, but other times it will cause the enemy to get squished against the ceiling, killing it.

 This is one of the more complicated blob forms. By tossing a parachute jellybean out in front of you, the blob will pick it up, turn into a parachute, and immediately crumple to the ground. You have to walk over to it, at which point the boy will pick it up and stuff it into his backpack. Then, you can drop off the side of a cliff and tap the JUMP button to deploy your blob parachute. Tap JUMP again to retract it. Like MDK, this is an infinite cycle, so you can use and re-use the parachute as often as needed.
You can get a lot of lateral movement out of the parachute, moving in almost a straight horizontal line at high speeds, which means you can even use it for gap-crossing that you might otherwise do with a series of trampoline jumps. Since you don’t have to toss a new jellybean to re-deploy the parachute, this is a quick way to get through the environment. Careful control of your movement is also the key to getting a few tucked-away treasure chests that you wouldn’t even see if you just fell straight down.

You’ll slowly speed up the longer you fall, but pressing UP will allow you to slow your descent somewhat, and pressing DOWN will have the opposite effect. You will need to use these control tweaks, since later levels have very long drops filled with sky mines. These things will line the walls, jut out into your path, and even move back and forth in front of you (especially in challenge levels), requiring that you dodge around them. Getting the hang of the controls here can be a bit tricky, especially given the high speed at which you can move to the left or right, but mastering the parachute is needed for survival throughout many levels.

 The ball is the smallest of the blob forms. It’s similar to a bowling ball: very small and very heavy. Like the parachute, this object doesn’t really do anything on its own. Toss a jellybean, and once the blob transforms, you have to walk over to it and pick it up. The boy’s movement is slowed considerably when carrying it, and he walks hunched over.

The ball has a few uses. For one, the boy can kick it through small openings to get the blob into places where he couldn’t normally go. From there, the boy can toss a jellybean to get the blob to press a switch or destroy a wall that might be blocking his path. The ball moves quickly when kicked and will bounce around quite a bit. For some extra height, you can even toss a jellybean immediately in front of the ball and kick it, which will send it flying into the air.

You can also kick the ball into certain enemies for different effects. Kicking a ball into the small starfish enemies will kill them immediately. There are often long rows of these jumping enemies, so you can splat several of them at once. Since they jump, they can avoid your ball, meaning that may need to catch it when it rolls back and kick it again.

There is also a hopping frog-like enemy with a long tongue that is solely affected by the use of the ball. When you kick the ball toward it, it will stick out its tongue and eat it, and then turn to hop away. When you call the blob, he’ll turn back into his standard form, exploding the frog from the inside. This can be used to simply bypass the frog, but also to potentially detonate the frog near a series of sky mines to open up a new path.


Delicious!


 Next up is the anvil. If you don’t already feel like you’re living in a cartoon world with the potable hole, this should help to sell the illusion. As you’d expect, the anvil is even heavier than the ball, so much so that the boy can’t pick it up. Once the blob takes on the anvil form, the boy can move to the right or left of it and shove it slowly along the ground. Functionally, it works in the exact same way as a rock, except that it can’t be broken by jumping on it repeatedly.
The most obvious use of the anvil is to press buttons, or drop it onto enemies’ heads to kill them. However, not all enemies can be killed by an anvil to the head. A couple of them will allow the anvil to sit on their heads while they continue along their patrol route. This allows you to jump onto the anvil and take a ride, usually along a safe path that avoids some nasty spikes.

The anvil can also be used to drop down through certain breakable blocks to destroy them, and you can use it (or the jack) to create a makeshift stepstool for you to get up to slightly higher areas. Since the boy can only make a jump to about waist level, there are more than a few points in the game where you just won’t be able to make it past a short wall, and you’ll have to resort to one of the blob forms to get you through.

 Gamers from the 80’s will remember this toy, which actually took quite a bit of physical exertion to use. The developers certainly could have gone with the more common of hoppity toys: the pogo stick. But in the design and animation of the blob, they took extra effort to ensure that he looked and acted extra blobby through both his movements and transformations. And so, what’s blobbier than a pogo stick? A hippity-hop!
You can’t get the same height as you can with a trampoline, but you can hop as long and as far as you wish without dropping another jellybean. And you can gain some extra height by pressing the JUMP button at the right moment, which is a bit more difficult to do than it is with the trampoline, potentially leading to some under-jumps that will kill you.

The hippity-hop is a bit finicky, as it will bounce off of walls and ceilings with great force, making it difficult to use in tight spaces (as you’ll need to do in a few challenge levels), and getting the timing right is difficult if you need to make a series of precision high jumps.

The hippity-hop also floats on water. In a few spots, you can just leisurely coast across a body of water, but more often you’ll be jumping in and out, and dodging enemies as well. It can also crush smaller enemies (such as starfish) and bounce off of others that would ordinarily kill you instantly. Sky mines will still kill you regardless.

 The giant ball is a crazy thing. In the first game, you had a bubble that you could climb into that allowed you to move underwater. This game has no underwater travel, but still has a giant ball that you can climb inside.


The default movement speed for the giant ball is pretty fast, but you can hold down the JUMP button to achieve ludicrous speed. This lets you fly up quarter-pipe ramps, soar high through the air, and crush most enemy types, as well as detonate sky mines without being killed. One of the larger brute-like enemies will also grab the ball and chuck it through the air, which is required to get through some levels, and it also increases the craziness of navigating the environment.

 This is the world’s longest jack, and it can reach heights that defy logic. You can use it in a variety of ways, from pressing buttons mounted to the ceiling, to elevating rocks and enemies to higher platforms, to knocking slate rocks out of your way. There are even some instances where you can jack up the ceiling to raise it and change the layout of the entire environment, move obstacles, and even raise the floor.
The jack can be raised or lowered at will using the ACTION and ALT ACTION buttons. It can also be used as a stepstool to hop over short walls, or it can be raised between two distant platforms and used as a stepping stone to hop from one to the next.

 In the first game, the rocket’s only use was to take you to Blobolonia. Here too, when you first receive this new blob form, you will automatically toss it to the blob, hop on, and rocket through space to his home planet. And keeping with the tone, the boy doesn’t just straddle the thing Strangelove-style; rather he lays down and presses his face lovingly against it as he rocket-hugs through the void.
Reaching Blobolonia occurs at about the midpoint of the game, rather than occurring toward the end as it did in the original. From here, the world gets a bit strange, with some psychedelic colors and such. But more importantly, you’ll start to encounter some of the quirkier blob forms, the first of which is the rocket. Toss a jellybean and hop on, and the game will pause for a brief moment, pulling the camera back so you can see where you’re going.

Movement is pretty fast, and your only control options are to turn the rocket, or to make it go even faster! You can fly in any direction, or if you let off the controls, it will fly straight forward in the direction it was aimed. Like all forms, tapping the CALL button will cause it to disappear as the blob resumes his native form, but you need to be particularly careful here, since you could be high above the ground and/or moving at a high rate of speed.

For the most part, you can bounce off the walls and ceiling and you’ll keep going, but if you ram the rocket into a solid surface perpendicularly, the blob will return to his normal form and you’ll fall. Navigating to hidden treasure chests is especially invigorating, as these paths are often narrow and/or lined with sky mines. You may need to speed up to dodge around the moving sky mines to get your reward. The rocket-based challenge levels are some of the more interesting in the game, not to mention fast-paced.

 Ah, the cannon. What better way to break down a wall than to roll up into a ball and shoot yourself at it? When you hop into the cannon, you can aim anywhere within a 90 degree window, from a straight vertical or horizontal shot to anything in between.
Early on, you’ll simply be tasked with using it horizontally for gap crossing, but eventually you’ll need to shoot yourself up and over enemies and obstacles, and to ricochet the boy into the proper place. The boy will stay tucked into a ball for a goodly amount of time, and he gets fired from the cannon with great velocity. During this time, he’ll bounce off of walls and ceilings and even crush certain enemies.

What’s even more fun is that you can use the cannon in conjunction with the little piglet-like enemies. Drop a cannon in front of one and it will get sucked in. You only have a couple of seconds to aim the cannon, as it will fire automatically. This lets you cannonball things that would be unsafe for the boy, such as detonating a row of sky mines.

 This is a pretty basic device, and it’s only used in a couple of instances. The shield is heavy and cannot be used while walking. So, you’ll need to stop and press the ALT ACTION button to hold it up in front of you.
The shield is mainly used to defend yourself against enemy projectiles and mobile sky mines. Just be sure that the sky mine is completely destroyed before lowering your shield, or you’ll be caught in the blast and killed.


 There are enemies in the game that are black blobby versions of the boy, and they will walk in the opposite direction as he does (meaning that they’ll walk to the left when he walks to the right). As you can see in the BCE section below, they can be a pain to deal with.
You eventually get a blob boy of your own, and he operates in the same way, except that he’ll move in the same direction as you, instead of the opposite. This form is mainly used in the final area for some complicated button pressing, which often requires you to press several buttons simultaneously.

Since the blob boy can’t be hurt, you can send him walking into danger, let him lure enemies away, or walk face-first into a row of sky mines. You can also use the blob boy together with the real boy to push extremely heavy objects that the boy cannot move on his own.

There is one final form that you pick up toward the very end of the game, which is quite unlike the others. You can see more about it in the Bosses section below, as it is gained as part of the final boss encounter, and is used in the final battle.
You can only have one jellybean on the screen at a time, and it will disappear after a while if it’s not eaten for any reason. If you toss a jellybean and it doesn’t land where you want it to, you can toss another and the first will instantly disappear.

There are a few spots where you may have to ricochet a jellybean off of an object or wall to get it where it needs to go. Also, there are some areas that have roots growing over the path, and neither the boy nor the blob can pass through them. However, if you toss a jellybean onto the roots, it will slowly sink down and fall through. This is used in a few puzzles where the blob has been sent down to a lower section.

The blob cannot be killed. In fact, in his default form, he cannot interact with enemies at all. As such, you can feel free to toss jellybeans into any dangerous situation, or to use any of the blob’s forms to trigger traps without fear of him coming to harm.

The blob does unfortunately encounter some pathfinding issues. Sometimes he’ll get stuck hopping against a wall, when he could just take a step back and hop over it to meet up with you. When he gets particularly frustrated, he’ll begin to turn red. This was part of the original design concept that was going to incorporate gameplay where you had to ensure that the blob remained happy, but this was thankfully dropped from the final release. Another remnant of that gameplay concept is the HUG button. Fortunately, as mentioned above, there is a trick to making the blob turn into a balloon whenever you wish, so this will at least keep you from getting stuck and having to restart the level.

If you happen to lose track of the blob entirely, you can press RIGHT on the D-pad and the screen will shift to the blob’s location. This can be handy in certain situations where the blob can be sent to scout out offscreen areas and determine if it is safe for you to move there. Also, this helps you line up jellybean drops. For instance, you may need to toss a jellybean down into a pit of spikes to create a trampoline, and you’ll want to know exactly where the blob has taken form so that you don’t inadvertently jump to your death.

The blob also occasionally gets a bit overzealous with his jellybean consumption and may hop up into the air to catch a freshly-tossed bean. This can cause him to manifest into a new form too early and miss the target location you had intended. He can also sometimes approach a jellybean from the left or right and take on a shape just off-center from where the bean was dropped, making him miss the intended target.

The goal of each level is to simply make it to the exit, which is marked with a shining golden jellybean. When the boy touches it, the blob will come to him, eat the jellybean, and turn into an exit door. This all occurs automatically and does not require any interaction on the part of the player. Once the boy passes through the door, he’ll be placed back at the hideout where you may select another level.


The game autosaves at the end of each level. In an interesting touch, starting a new play session will start the boy directly in his most recent hideout, lying in bed and using the blob as a pillow. The game’s title will appear over the boy’s darkened hideout, and when you start the game, the title will disappear, the lights will come up, and the boy will stretch and get out of bed. This all occurs without ever entering an in-game menu.

You may return to the hideout at any time from the game’s pause menu, but the only way to get captured treasure chests back to your hideout is to finish the level with them, even if you just went back into the level to grab one that you missed. The map on the wall indicates how many treasure chests you’ve found in each level. Also, at any point within the level, you can bring up the jellybean interface and hold it onscreen for a couple of seconds, and the number of captured chests will be shown in the upper right.

Most enemies will stay dead once they have been killed, and will only return if you opt to replay a level. However, some enemies and objects are required to solve certain puzzles, and these will return to the game world if you accidentally destroy them before they have served their purpose. Again, this keeps you from getting into too many situations where you might have to restart a level because you get stuck.

The game is littered with many of your typical action-adventure staples: buttons, locked doors, and environmental objects that can be moved, such as rocks. There are also a number of falling platforms that will vibrate for a moment when you land on them, and then fall toward the ground. These can be ridden all the way down without harming the boy, provided they are not hovering above a bottomless pit.

There is also quite a bit of atmosphere in the game. Since all of the in-game graphics are hand-drawn, the entire experience has the look of a vibrantly-colored cartoon. Lighting is used extensively to both set the mood and set up challenges for the player by hiding things in darkness. The background is filled with noises as well, such as chirping crickets.

There is also an array of creatures roaming the environments that do not interact with you directly, but help to add life to the world. Most of these creatures will go about their business without taking any particular notice of you, but some of them will modify their movements based on your actions. For instance, toss a hole in front of a family of roaming slugs and see what they do.

BASTARD CLASS ENEMIES (What's this?)
 Yellow Bird The yellow bird is the only enemy you’ll encounter in the game that is not a shadow creature. You cannot interact with him directly, but he has one mean skill that will cause you some frustration: he can eat your jellybeans.
Any jellybean tossed in the immediate vicinity of one of these birds will be eaten right out of the air. The bird is so fast that you can’t even toss a bean to the blob if he’s standing right next to you. For the most part, these birds are just in place to add to the given puzzle, and make you think about creative ways to get past without using a jellybean, or by transforming the blob offscreen and then bringing him back into the puzzle area.

While you can’t touch the yellow bird, and he can’t hurt you, you do still have an opportunity to get your revenge. If you toss a jellybean near a sky mine, the bird will fly after it, crashing into the sky mine and detonating it. All that is left behind is a puff of yellow feathers. Too bad.


Black Blob Boy There are many, many games that put you up against a shadow version of yourself. These are generally the most challenging levels in a game because your shadow self has all of the same strengths that you do, and often does not share the same weaknesses. Sometimes you’ll be placed in an outright fight with your shadow self, but often you’ll find that the shadow will mimic your every move, making it well-nigh impossible to harm him.

The black blob boy appears very late in the game, and he looks similar to blob's boy form, except that it has little knobby horns. He will walk in the opposite direction that you do, so when you’re walking to the right, he’s walking to the left… and coming right toward you. You can’t jump over him because he’ll jump when you jump. You can trick him just a bit by getting him to walk into something that he cannot pass, and this is the strategy needed to solve many of the game’s button-pressing puzzles. There are actually many instances throughout the game where you’ll need to get enemy blobs to press buttons for you.

The one advantage you have over him is that you have a blob and he does not. So, if you drop a ladder and start climbing, he does not have any way to mimic this movement. Or, another acceptable strategy would be to climb aboard your hippity-hop (if it’s available to you) and bounce up over the blob boy’s head. You can use strategies like this to get around him. Once you have moved past him, he’ll keep walking away from you.

BOSSES
The bosses in A Boy and His Blob are almost entirely puzzle-driven. Sure, you’ll need to do some platforming and have the proper timing, but it generally boils down to using the right form at the right time, and luring the boss into harm’s way. Since all bosses can kill you with a single hit, much of the challenge comes from determining which blob form you need to use and when it is best to use it. Using the wrong form at the wrong time will often get you cornered and killed.
First Boss
This is boss is a huge snake which appears on the right side of the screen. It can slither off of one side of the screen and appear on the other, and it can pull its head back and strike at you. As he is getting ready to strike, you’ll need to toss an anvil on the spot where his head will hit, and he will be stunned.

Following this, the electrical wires at the top of the screen will lower, and you can use the trampoline to get up onto them. The snake will follow you, and from there, you can lure him to strike the electricity. The power line will break and start swinging, dropping you and the snake back down to the ground.

Finally, the snake will start jumping up off the top of the screen, and it will take quite a while for him to make it back down to the ground. You’ll see a shadow indicating where he will fall, and you can toss a hole in that spot to make him fall straight through it and into the water.

That is the final blow. He’ll pop back up onto the land and flop about, lose form, and die.

From here, you’ll be in a transition between the first and second areas, as you move through the darkness with a full moon hanging the background. You’ll pass through a city, complete with a subway, and eventually make your way to a house. The house will become your new hideout and the map on the wall will allow you to access the next set of levels, or return to the first hideout. Also, if you captured all 3 treasure chests during the course of the preceding level, you’ll need to go back to your previous hideout to open them.

Second Boss
In a scene very reminiscent of the first area in Out of This World, this large 4-legged creature will appear on a ridge in the background of the preceding area. Eventually, you’ll drop down into a darkened section of the cave, where the creature will face you directly.

You are equipped with only a hole and a giant ball (and a balloon, which you do not need). You start out on the ground level with the boss standing right in front of you, and if you don’t take immediate action, it will swipe at you with its claws and kill you.

Along the top of the screen are 3 sky mines. You need to get up to the top section and get the sky mines to come in contact with the creature without succumbing to his attacks. Each one has a different method: one can be dropped down by laying a hole beneath its path, one by pressing the button next to it and moving the barrier, and with one you’ll need to lure the creature into jumping up at you and hitting it himself.

The creature cannot get up to the top section, but his attacks can reach you if you stand still for too long. You are impervious to his attacks while inside the giant ball, but it takes quite a while to get into one, so you risk getting killed if you wait too long. The room also has several quarter-pipe ramps which is what you’ll need to use to get the upper section. The speed of the ball and the aggressiveness creature can make this very difficult if you’re not both patient and dexterous. This is especially true when timing your landing to hit the button in the center. This is one case where simply knowing how to solve the puzzle is not a guarantor of success.

The creature starts out by using the tentacles on his back to try to reach you. After getting hit with one sky mine, he’ll start jumping up to hit you and can shoot several blob projectiles at you. It’s best to hit him with a sky mine and then immediately jump into the giant ball and move away. This is good advice even if you miss, because otherwise you can be caught in his attack.


On the third hit, you’ll be treated to another protracted and well-animated death sequence. In a cutscene, you’ll see the boy and blob standing on a ridge, and he tosses a jellybean to the blob, which transforms him into a rocket. The boy hops aboard and flies through space until he eventually crash-lands through the roof of a blob domicile on planet Bobolonia. This is your new hideout for the next set of levels.


Third Boss
This boss is a huge bird that fires projectiles at you. You can catch these projectiles in your cannon and fire them back at the bird. Once you do, the bird will be stunned and you’ll need to get up onto one of the platforms above it.

Use the trampoline to get up, then transform the blob into an anvil, and push it off the ledge onto the bird’s head, or onto its wings. The bird only remains stunned for a while, and you have just enough time to accomplish this task before it wakes up. If you don’t do it quickly enough, the bird will wake up and you’ll have to start again. You’ll need to do this 3 times.

The bird has a short range dive bomb attack, but it has a long telegraph so it’s not terribly difficult to avoid. However, each time you damage the bird, it will become harder to dodge its projectiles. He’ll eventually fire 2 projectiles which will bounce around the area several times before exploding, and then he’ll start firing projectiles that bounce low across the ground, and you’ll have to run under them.

The bird writhes in pain and disintegrates, leaving you to move onto your next hideout, and the final area. Here you’ll need to make a journey to the palace of the final boss, and then infiltrate it and take him down.


Fourth Boss
So you finally meet up with the primary villain of the game, a humanoid blob creature who is the only blob-based enemy you’ll face that isn’t entirely black. This gray creature sits on a blob throne and sends blobs dropping down from the ceiling. You’ll need to be mindful of their shadows to avoid them.

This battle nearly qualifies as a Rube Goldberg experiment. The battle takes place on a single screen and it’s your goal to get a rock up to the top of the screen so that you can drop it on the head of the boss.

You’ll need to climb up, position the rock properly, and use the jack to move it up to the next platform.

Then you’ll need to use the blob boy form to push the rock to the right and onto a plunger. This is probably the most challenging portion of the battle, because you’ll need to run back and forth several times to get the rock all the way across, all the while dodging blobs from the ceiling.

Finally, you use the jack to press a button on the ceiling to pull the plunger back, and then let off to send the rock flying. One hit and the fight is over. Easy, right? Blobolonia is saved… but where are the end credits? Well, while his crown fell to the ground, the boss wasn’t actually killed; he only slithered away, so you still have a bit further to go.

It a cutscene, the boy tosses a jellybean to the blob and he transforms into a rocket, and the boy hops on for his return journey home. The rocket flies through space and then directly through the window of your treehouse hideout. Examining the map on the wall shows that a new section tacked onto it, with 2 more levels. Back into the fray!


At the beginning of this first new level, a gray claw reaches up out of the ground suddenly, grabs the blob, and pulls him under the ground. The claw is the same shade of gray as that of the recently-destroyed (?) boss. This is the second time in the game that the blob is kidnapped, but you’ll only need to pass through a short section to get him back.

Soon, you’ll encounter another cutscene showing the claw ripping out of the ground again, with the blob squeezed in its fist. It will then squeeze the blob so hard that he is crushed into bits and falls to the ground in a useless pile. The boy, obviously distraught over the loss of his blob-buddy, runs over to the pile and drops to his knees, and cries.

But what…? His tears restore the blob to life, he springs back up, glowing blue with the love of the boy, and takes on his final form… the mech!


 The mech form moves slowly, but it is impervious to all dangers. It can jump high, crush blocks and enemies under its weight, and punch the crap out of anything it wants, including those dastardly sky mines and yellow birds.
Holding the ALT ACTION button down will cause him to just stand still and punch repeatedly. Its only drawback is that it’s too large to fit through some tight spaces. So, the boy will need to occasionally disembark to seek out some hidden treasure chests. At the end of these 2 mech-rampaging levels, you’ll meet up with your gray foe once more, only now he has taken on a new form.

Final Boss
When you reach the final area, a river of green water will start rushing by. Then you’ll see the grotesque form of the boss, and for no apparent reason, the sky will turn red.

In the first phase of this battle, the boss will drop blobs on you from the ceiling, just as he did during your first encounter. After a while, the blobs will stop and the boss will unleash a couple of huge energy balls. You’ll need to use the shield to block them, and you’ll need to equip it quickly after the falling blobs cease, because it takes a few seconds to go from tossing the jellybean, to watching the blob transform, to picking up the shield, to holding it up to defend yourself.

After the blasts, the boss will be stunned momentarily. Here, you’ll need to transform the blob back into a mech – again a process that takes a fair amount of time to compete – and then walk the mech up to the boss and hold down the ALT ACTION button to punch him repeatedly in the face.

Eventually the boss will stop taking damage, moving on to phase 2. Here, he’ll make green slimy water rise up from the ground, and you’ll need to use your hippity-hop to get up onto the highest platform and get your shield ready for the next set of energy blasts.

After a couple more rounds of face-punching, the gray blob turns to mush, and you’re treated to the ending cinematic and credits.

HERITAGE
Why this game should be part of your 2D heritage:
- Experience the blob transformation gameplay of the original, with several tweaks and improvements
- Frequent checkpoints prevent the need to retrace your steps if you fail to solve a puzzle
- A wide range of blob forms, many of which have alternate uses
- Challenge levels that fully explore the possibilities of each blob form
- Tons of unlockable content as a reward for completing these challenges
- A great deal of effort was put into adding life and atmosphere from an aural, visual, and animation standpoint
The downside:
- Jellybeans change positions with each level
- Minor pathfinding issues can lead to frustration, and blob sometimes eats a jellybean and assumes a form in an unexpected place
- Odd choice of tone when it comes to the boy calling the blob


2 comments:
Wow! Extremely in-depth look at the game! Now, while I'm only in World 3, I do very much like the game. I showed it off to my sister and cousin, but one of them spouted that it should have been cheaper.
Why does a 2D game immediately have to be either downloadable-only or very cheap to sell nowadays? I can see the passion they put into this game, and I hope they keep making great games like it.
By the way, their next 2D game is Batman: Brave and the Bold, and we might be seeing A Boy and His Blob on 3DS, so I'll see how that goes. - Alex W
Unfortunately, the industry isn't doing much to discourage the impression that 2D games are somehow "worth less" than their 3D brethren. There are very few major franchises that are seeing full-fledged releases in the 2D realm.
Younger gamers tend to think that 2D games are being created due to budgetary limitations rather than a stylistic (and gameplay) choice. They also don't remember the days when all games were 2D.
That said, there are still plenty of good new 2D games out there (obviously, or we wouldn't be around). We are also looking forward to WayForward's release of Batman: Brave and the Bold, as well as their DSiWare release of Shantae: Risky's Revenge.
Post a Comment